HTML is able to allow an event trigger action in a browser, like starting JavaScript when a user clicks on an element.
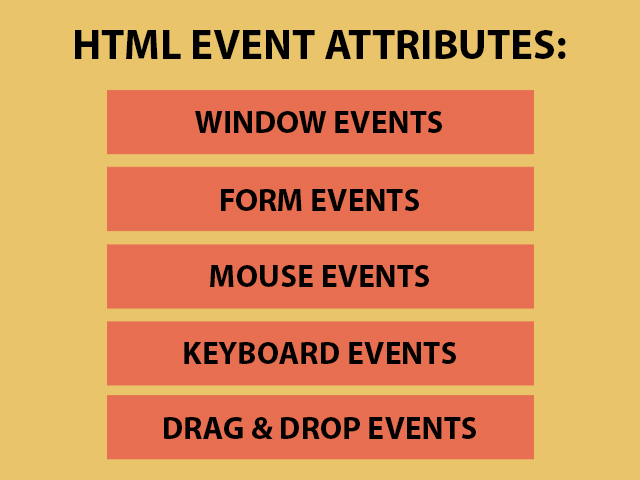
Events (window event attributes) triggered for the window object (in the <body> element):
onafterprint (value-script) – the event starts when a page has started printing, or if the print dialogue box has been closed.
Syntax:
<body onafterprint="script">
onbeforeprint (value- script) – the event starts when a page is about to be printed.
Syntax:
<body onbeforeprint="script">
onbeforeunload (value- script) – the event starts when the document is about to be unloaded.
Syntax:
<body onbeforeunload="script">
onerror (value- script) – the event starts when an error occurred while loading an external file.
Syntax:
<body onerror="script">
onhashchange (value- script) – the event starts when there have been changes to the anchor part (begins with a ‘#’ symbol) of the current URL.
Syntax:
<element onhashchange="script">
Example:
<!DOCTYPE html>
<html>
<body onhashchange="onhashchangeExample()">

<p>Press the button to change the anchor part of the current URL to #newPart.</p>

<button onclick="changePart()">Try it</button>

<p id="example"></p>

<script>
// Use the location.hash property to change the anchor part
function changePart() {
  location.hash = "newPart";
  var x = "The anchor part is now: " + location.hash;
  document.getElementById("example").innerHTML = x;
}

// text alert
function onhashchangeExample() {
  alert("The anchor part has changed!");
}
</script>

</body>
</html>
Output:
Press the button to change the anchor part of the current URL to #newPart.
onload (value- script) – the event starts when an object has been loaded.
Syntax:
<body onload="script">
onmessage (value- script) – the event starts when the message is triggered.
onoffline (value- script) – the event starts when the browser starts to work offline.
Syntax:
<body onoffline="script">
ononline (value- script) – the event starts when the browser starts to work online.
Syntax:
<body ononline="script">
onpagehide (value- script) – the event starts when a user navigates away from a website.
onpageshow (value- script) – the event starts when a user navigates to a website.
Syntax:
<body onpageshow="script">
onpopstate (value- script) – the event starts when the window’s history changes.
onresize (value- script) – the event starts when the browser window is resized.
Syntax:
<body onresize="script">
Example:
<!DOCTYPE html>
<html>

<body onresize="onresizeExample()">

<p>To see the alert, resize the browser window.</p>

<script>
function onresizeExample() {
  alert("You have changed the size of the browser window!");
}
</script>

</body>
</html>
Output:
To see the alert, resize the browser window.
onstorage (value- script) – the event starts when a Web Storage area is updated.
onunload (value- script) – once a page has unloaded (or the browser window has been closed).
Syntax:
<element onunload="script">
Events (form events) triggered by actions inside a HTML form:
onblur (value- script) – the event starts the moment that the element loses focus.
Syntax:
<element onblur="script">
Example:
<!DOCTYPE html>
<html>
<body>

Enter your name: <input type="text" name="name" id="name" onblur="onblurExample()">

<p>When you leave the input field, a function is triggered which transforms the input text to upper case.</p>

<script>
function onblurExample() {
  var x = document.getElementById("name");
  x.value = x.value.toUpperCase();
}
</script>

</body>
</html>
Output:
Enter your name:
When you leave the input field, a function is triggered which transforms the input text to upper case.
onchange (value- script) – the event starts the moment when the value of the element is changed.
Syntax:
<element onchange="script">
Example:
<!DOCTYPE html>
<html>
<body>

<p>Select an option from the list.</p>

<select id="optionList" onchange="onchangeExample()">
    <option value="HTML">HTML</option>
    <option value="CSS">CSS</option>
    <option value="JavaScript">JavaScript</option>
    <option value="jQuery">jQuery</option>
</select>

<p>When you select an option, a function is triggered which outputs the value of the selected option.</p>

<p id="example"></p>

<script>
function onchangeExample() {
  var x = document.getElementById("optionList").value;
  document.getElementById("example").innerHTML = "You selected: " + x;
}
</script>

</body>
</html>
Output:
Select an option from the list.
When you select an option, a function is triggered which outputs the value of the selected option.
oncontextmenu (value- script) – the event starts when the user right-clicks on an element to open the context menu.
Note:The contextmenu attribute only works in Firefox!
Syntax:
<element oncontextmenu="script">
onfocus (value- script) – the event starts the moment that the element gets focus.
A function is triggered when one of the input fields gets focus (the function changes the background color of the input field).
Output:
Name:
Surname:
oninput (value- script) – the event starts when an element gets user input.
Syntax:
<element oninput="script">
Example:
<!DOCTYPE html>
<html>
<body>

<p>Type something in the text field to trigger a function.</p>

<input type="text" id="myText" oninput="oninputExample()">

<p id="example"></p>

<script>
function oninputExample() {
  var x = document.getElementById("myText").value;
  document.getElementById("example").innerHTML = "You wrote: " + x;
}
</script>

</body>
</html>
Output:
Type something in the text field to trigger a function.
oninvalid (value- script) – the event starts when a submittable <input> element is invalid.
Syntax:
<element oninvalid="script">
onreset (value- script) – the event starts when a form is reset.
Syntax:
<element onreset="script">
onselect (value- script) – the event starts after some text has been selected in an element.
Syntax:
<element onselect="script">
Example:
<!DOCTYPE html>
<html>
<body>

Select the text: <input type="text" value="Select me!" onselect="onselectExample()">

<script>
function onselectExample() {
  alert("Thanks! You have selected some text!");
}
</script>

</body>
</html>
Output:
Select the text:
onsubmit (value- script) – the event starts when a form is submitted.
Syntax:
<form onsubmit="script">
Example:
<!DOCTYPE html>
<html>
<body>

<form action="" onsubmit="onsubmitExample()">
  Name: <input type="text" name="firstName">
  <input type="submit" value="Submit">
</form>

<script>
function onsubmitExample() {
  alert("The form was submitted");
}
</script>

</body>
</html>
Output:
The event (keyboards events) starts when the user is pressing/ releasing a key:
onkeydown (value- script) – the event starts when a user is pressing a key.
Syntax:
<element onkeydown="script">
Example:
<!DOCTYPE html>
<html>
<body>

<input type="text" onkeydown="onkeydownExample()">

<script>
function onkeydownExample() {
  alert("You pressed a key inside the input field");
}
</script>

</body>
</html>
Output:
onkeypress (value- script) – the event starts when the user presses a key (on the keyboard).
Syntax:
<element onkeypress="script">
onkeyup (value- script) – the event starts when the user releases a key (on the keyboard).
Syntax:
<element onkeyup="script">
Example:
<!DOCTYPE html>
<html>
<body>

<p>Type some text (the function transforms the character to upper case):</p>
Type some text: <input type="text" id="someText" onkeyup="onkeyupExample()">

<script>
function onkeyupExample() {
  var x = document.getElementById("someText");
  x.value = x.value.toUpperCase();
}
</script>

</body>
</html>
Output:
Type some text (the function transforms the character to upper case):
Type some text:
Mouse Events:
onclick (value- script) – the event starts on a mouse click on the element.
ondblclick (value- script) – the event starts on a mouse double-click on the element.
Syntax:
<element ondblclick="script">
Example:
<!DOCTYPE html>
<html>
<body>

<p id="example" ondblclick="ondblclickExample()">Double-click on the text to change the text color.</p>

<script>
function ondblclickExample() {
  document.getElementById("example").style.color = "#2a9d8f";
}
</script>

</body>
</html>
Output:
Double-click on the text to change the text color.
onmousedown (value- script) – the event starts when a mouse button is pressed down on the element.
Syntax:
<element onmousedown="script">
onmousemove (value- script) – the event starts when the pointer is moving while it is over an element.
onmouseout (value- script) – the event starts when the mouse pointer moves out of an element.
Syntax:
<element onmouseout="script">
onmouseover (value- script) – the event starts when the mouse pointer moves over an element.
Syntax:
<element onmouseover="script">
onmouseup (value- script) – the event starts when a mouse button is released over the element.
Syntax:
<element onmouseup="script">
Example:
<!DOCTYPE html>
<html>
<body>

<p id="p-1" onmousedown="mouseDown()" onmouseup="mouseUp()">
Click the text! The mouseDown() function is triggered when the mouse button is pressed down over this paragraph. The function sets the color of the text to red. The mouseUp() function is triggered when the mouse button is released. The mouseUp() function sets the color of the text to green.
</p>

<script>
function mouseDown() {
  document.getElementById("p-1").style.color = "#e76f51";
}

function mouseUp() {
  document.getElementById("p-1").style.color = "#2a9d8f";
}
</script>

</body>
</html>
Output:
Click the text! The mouseDown() function is triggered when the mouse button is pressed down over this paragraph. The function sets the color of the text to red. The mouseUp() function is triggered when the mouse button is released. The mouseUp() function sets the color of the text to green.
onwheel (value- script) – the event starts when the wheel of a pointing device is rolled up or down over an element.
Syntax:
<element onwheel="script">
Example:
<!DOCTYPE html>
<html>
<head>
<style>
#example {
  border: 2px solid #333;
}
</style>
</head>
<body>

<div id="example" onwheel="onwheelExample()">This example demonstrates how to assign an "onwheel" event event to a DIV element. Roll the mouse wheel over me - either up or down!</div>

<script>
function onwheelExample() {
  document.getElementById("example").style.fontSize = "30px";
}
</script>

</body>
</html>
Output:
This example demonstrates how to assign an “onwheel” event event to a DIV element. Roll the mouse wheel over me – either up or down!
Drag Events:
ondrag (value- script) – the event starts when an element or text selection is being dragged.
Syntax:
<element ondrag="script">
Example:
<!DOCTYPE HTML>
<html>
<head>
<style>
.drop-target {
  float: left;
  width: 100px;
  height: 50px;
  text-align: center;
  margin:20px;
  border: 2px solid #333;
}
</style>
</head>
<body>

<div class="drop-target" ondrop="drop(event)" ondragover="allowDrop(event)">
  <p ondragstart="dragStart(event)" ondrag="dragging(event)" draggable="true" id="drag-target">Drag me!</p>
</div>

<div class="drop-target" ondrop="drop(event)" ondragover="allowDrop(event)"></div>

<p style="clear:both;" id="exampleOne"></p>

<script>
function dragStart(event) {
  event.dataTransfer.setData("Text", event.target.id);
}

function dragging(event) {
  document.getElementById("exampleOne").innerHTML = "The p element is being dragged";
}

function allowDrop(event) {
  event.preventDefault();
}

function drop(event) {
  event.preventDefault();
  var data = event.dataTransfer.getData("Text");
  event.target.appendChild(document.getElementById(data));
  document.getElementById("exampleOne").innerHTML = "The p element was dropped";
}
</script>

</body>
Output:
Drag me!
ondragend (value- script) – the event starts when the user has finished dragging an element or text selection.
Syntax:
<element ondragend="script">
ondragenter (value- script) – the event starts when a draggable element or text selection enters a valid drop target.
ondragleave (value- script) – the event starts when a draggable element or text selection leaves a valid drop target.
Syntax:
<element ondragleave="script">
ondragover (value- script) – the event starts when a draggable element or text selection is being dragged over a valid drop target.
Syntax:
<element ondragover="script">
Example:
<!DOCTYPE HTML>
<html>
<head>
<style>
#dropTarget {
  float: left;
  width: 300px;
  height: 100px;
  margin: 20px;
  text-align: center;
  border: 2px solid #333;
}
</style>
</head>
<body>

<p ondragstart="dragStart(event)" draggable="true" id="dragtarget">Drag the text into the rectangle!</p>

<div id="dropTarget" ondrop="drop(event)" ondragover="allowDrop(event)">
</div>

<p style="clear:both;" id="exampleThree"></p>

<script>
function dragStart(event) {
  event.dataTransfer.setData("Text", event.target.id);
}

function allowDrop(event) {
  event.preventDefault();
  document.getElementById("exampleThree").innerHTML = "The p element is OVER the droptarget.";
  event.target.style.border = "5px dashed #264653";
}

function drop(event) {
  event.preventDefault();
  var data = event.dataTransfer.getData("Text");
  event.target.appendChild(document.getElementById(data));
  document.getElementById("exampleThree").innerHTML = "The p element was dropped.";
}
</script>

</body>
</html>
Output:
Drag the text into the rectangle!
ondragstart (value- script) – the event starts when the user starts to drag an element or text selection.
Syntax:
<element ondragstart="script">
ondrop (value- script) – the event starts when a draggable element or text selection is dropped on a valid drop target.
Syntax:
<element ondrop="script">
onscroll (value- script) – the event starts when an element’s scrollbar is being scrolled.
Syntax:
<element onscroll="script">
Example:
<!DOCTYPE html>
<html>
<head>
<style>
#text {
  border: 2px solid #333;
  width: 350px;
  height: 150px;
  overflow: scroll;
}
</style>
</head>
<body>

<div id="text" onscroll="onscrollExample()">He  was  an  old  man  who  fished  alone  in  a  skiff  in  the  Gulf  Stream  and  he  had  gone  eighty-four days now without taking a fish. In the first forty days a boy had been with him. But  after  forty  days  without  a  fish  the  boy’s  parents  had  told  him  that  the  old  man  was  now definitely and finally salao, which is the worst form of unlucky, and the boy had gone at  their  orders  in  another  boat  which  caught  three  good  fish  the  first  week.
<br><br>
It  made  the  boy  sad  to  see  the  old  man  come  in  each  day  with  his  skiff  empty  and  he  always  went  down to help him carry either the coiled lines  or  the  gaff  and  harpoon  and  the  sail  that  was  furled  around  the  mast.  The  sail  was  patched  with  flour  sacks and, furled, it looked like the flag of permanent defeat. </div>

<script>
function onscrollExample() {
  document.getElementById("text").style.color = "#2a9d8f";
}
</script>

</body>
</html>
Output:
He was an old man who fished alone in a skiff in the Gulf Stream and he had gone eighty-four days now without taking a fish. In the first forty days a boy had been with him. But after forty days without a fish the boy’s parents had told him that the old man was now definitely and finally salao, which is the worst form of unlucky, and the boy had gone at their orders in another boat which caught three good fish the first week.
It made the boy sad to see the old man come in each day with his skiff empty and he always went down to help him carry either the coiled lines or the gaff and harpoon and the sail that was furled around the mast. The sail was patched with flour sacks and, furled, it looked like the flag of permanent defeat.
Clipboard Events:
oncopy (value- script) – the event starts when the user copies the content of an element.
Syntax:
<element oncopy="script">
Example:
<!DOCTYPE html>
<html>
<body>

<input type="text" oncopy="oncopyExample()" value="Try to copy this text">

<p id="example"></p>

<script>
function oncopyExample() {
  document.getElementById("example").innerHTML = "You copied text!"
}
</script>

</body>
</html>
Output:
oncut (value- script) – the event starts when the user cuts the content of an element.
Syntax:
<element oncut="script">
onpaste (value- script) – the event starts when the user pastes some content in an element.
The HTML <map> element is used to specify an image map. An image map is an image with clickable areas.
The HTML <map> tag contains a number of HTML <area> tags, that specify the clickable areas in the image map.
Example:
<!DOCTYPE html>
<html>
<body>

<p>Click on the laptop, or the cup of coffee:</p>

<img src="https://lenadesign.org/wp-content/uploads/2021/06/homeOffice.jpg" alt="homeOffice" usemap="#workmap" width="640" height="480">

<map name="workmap">
  <area shape="rect" coords="34,44,270,350" alt="laptop" href="https://lenadesign.org/wp-content/uploads/2021/06/laptop.jpg">
  <area shape="circle" coords="337,300,44" alt="coffee" href="https://lenadesign.org/wp-content/uploads/2021/06/photoshop-gif.gif">
</map>

</body>
</html>
Output:
Click on the laptop, or the cup of coffee:
Note: The usemap attribute in <img> is linked with the <map> element’s name attribute, and creates a connection between the image and the map.
The HTML <area> element specifies an area inside an image map.
Attributes:
alt (value- text) -defines an alternate text for the area.
coords (value- coordinates) – defines the coordinates of the area.
x1,y1,x2,y2 – defines the coordinates of the top-left and bottom-right corner (shape=”rect”).
x,y,radius – defines the coordinates of the circle center and the radius (shape=”circle”).
x1,y1,x2,y2,..,xn,yn – defines the coordinates of the edges of the polygon.
download (value- filename) – defines that the target will be downloaded when a user clicks on the hyperlink.
href (value- URL) – defines the hyperlink target for the area.
media (value- media query) – defines what device the target URL is optimized for.
referrerpolicy (value- no-referrer/ no-referrer-when-downgrade/ origin/ origin-when-cross-origin/ same-origin/ strict-origin-when-cross-origin/ unsafe-url) – defines which referrer information to send with the link.
rel (value- alternate/ author/ bookmark/ help/ license/ next/ nofollow/ noreferrer/ prefetch/ prev/ search/ tag) – defines the relationship between the current document and the target URL.
shape (value- default/ rect/ circle/ poly) – defines the shape of the area.
target (value- _blank/ _parent/ _self/ _top/framename) – defines where to open the target URL.
type (value- media_type) – defines the media type of the target URL.
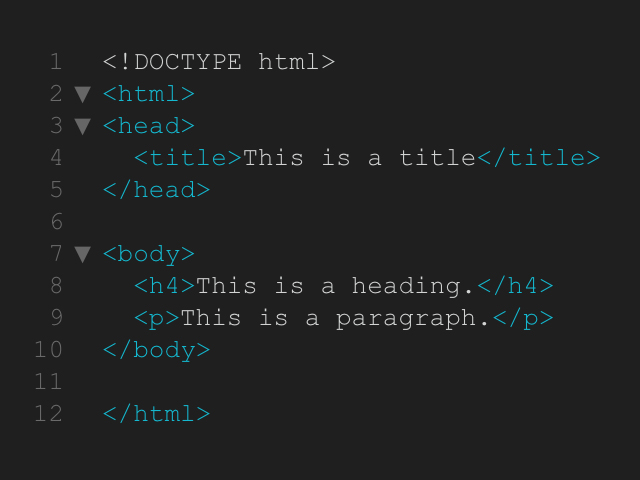
The basic structure of an HTML document contains 5 elements:
<!DOCTYPE>
<html>
<head>
<title>
<body>
HTML <!DOCTYPE>
Every HTML document must start with a <!DOCTYPE> declaration. The <!DOCTYPE> declaration is not an HTML tag. It is “information” to the browser about what document type to expect.
In HTML5, use the declaration:
<!DOCTYPE html>
Example:
<!DOCTYPE html>
<html>
<head>
<title>This is a title</title>
</head>

<body>
This is the content of the document.
</body>

</html>
Output:
This is a title
This is the content of the document.
HTML <html> tag
The HTML <html> element expresses the root of an HTML document.
The HTML <html> element is the container for all other HTML elements.
Example:
<!DOCTYPE html>
<html lang="en">
<head>
  <title>This is a title</title>
</head>
<body>

<h4>This is a heading.</h4>
<p>This is a paragraph.</p>

</body>
</html>
Output:
Tip: Include the lang attribute inside the element, to declare the language of the website (this is meant to assist search engines and browsers.):
This is a title
This is a heading.
This is a paragraph.
HTML <head> tag
The HTML <head> tag is a container for metadata (information about data) and is placed between the <html> tag and the <body> tag.
The metadata typically specifies the document title, character set, styles, scripts, and other meta information.
Inside the HTML <head> tag can be the following tags:
<base>
<!DOCTYPE html>
<html>
<head>
  <base href="https://lenadesign.org/" target="_blank">
</head>
<body>

<h4>The HTML base element.</h4>

<p><a href="https://lenadesign.org/">HTML base tag</a> - Notice that the link opens in a new window, even if it has no target="_blank" attribute. This is because the target attribute of the base element is set to "_blank".</p>

</body>
</html>
Output:
The HTML base element.
HTML base tag – Notice that the link opens in a new window, even if it has no target=”_blank” attribute. This is because the target attribute of the base element is set to “_blank”.
The HTML <style> element defines style information (CSS) for a document.
Inside the <style> tag you can define how HTML elements should render in a browser.
Example:
<!DOCTYPE html>
<html>
<head>
<style>
h4 {color:#2a9d8f;}
p {color:#e76f51;}
</style>
</head>
<body>

<h4>This is a heading</h4>
<p>This is a paragraph.</p>

</body>
</html>
Output:
This is a heading
This is a paragraph.
Note: To connect to an external style sheet, use the HTML <link> element.
Attributes:
media (value- media_query) – defines what media/device the media resource is optimized for.
Syntax:
<style media="value">
type (value- text/css) – defines the media type of the <style> element.
Syntax:
<style type="media_type">
To learn more about HTML <style> element go to the CSS tutorials.
The HTML <link> element specifies the connection between the current document and an external resource.
The HTML <link> element is often used to link to external style sheets (CSS).
The HTML <link> tag is an empty element (it contains only attributes).
The HTML <link> element should be placed in the<head> section of the document.
Example:
<!DOCTYPE html>
<html>
<head>
  <link rel="stylesheet" href="example-style.css">
</head>
<body>

<h4>This is a heading.</h4>

<p>This is a paragraph.</p>

<p>This is the second paragraph.</p>

</body>
</html>
Output:
Attributes:
crossorigin (value- anonymous/ use-credentials) – defines how the tag handles cross-origin requests.
href(value- URL) – defines the location of the linked file.
hreflang (value- language_code) – defines the language of the text in the linked file.
media (value- media_query) – defines what kind of device the linked file will be displayed.
referrer policy (value- no-referrer/ no-referrer-when-downgrade/ origin/ origin-when-cross-origin/ unsafe-url) – defines which referrer to use when fetching the resource.
rel (required), (value- alternate/ author/ dns-prefetch/ help/ icon/ license/ next/ pingback/ preconnect/ prefetch/ preload/ prerender/ prev/ search/ stylesheet) – defines the connection between the current document and the linked file.
size (value- HeightxWidth/ any) – defines the size of the linked resource. Only for rel=”icon“.
type (value- media_type) – defines the media type of the linked file.