How to make an animated GIF in Photoshop? You won’t believe how simple it is! It takes just a few minutes! To learn how to use your images to create an animated GIF watch the video tutorial below, or follow the steps from this post.

You can watch the tutorial video here. I hope you’ll find it helpful!
Note: This tutorial has been made in Photoshop CS6.
Here is how you can make your own animated GIF step by step. Let’s get it started!
Note: Before you’ll start making an animated GIF you have to get your images imported and ready to animate. So, if you have a series of images ready to go we can go to step 1.
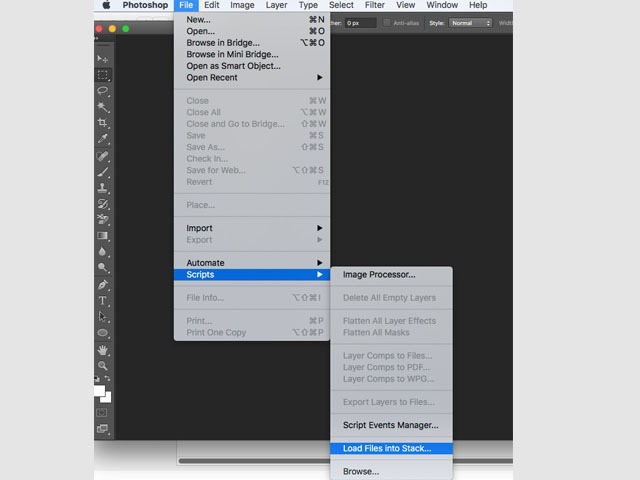
Step 1: Load images to Photoshop.
Load your images into stacks. From the top menu. Go to File->Scripts->Load Files Into Stack. This option allows you to load an entire range of your images, rather than needing to drag each one to your document individually.

Step 2: Set up your timeline.
Open the Timeline window (Window->Timeline). Once you have selected the Timeline option will appear at the bottom of your screen.


Step 3: Make Frames From Layers.
Press the button on the right side of the Timeline window, and select Make Frames From Layers.


Step 4: Choose the frame duration.
Under each frame, select how long it should appear before switching to the next frame. Then, at the bottom of the toolbar, select how many times you’d like it to loop.


Step 5: Preview your GIF.
Before saving your GIF, you can preview your GIF by pressing the play icon.

Step 6: Save your GIF!
Go to File->Save For Web…and press Save again.

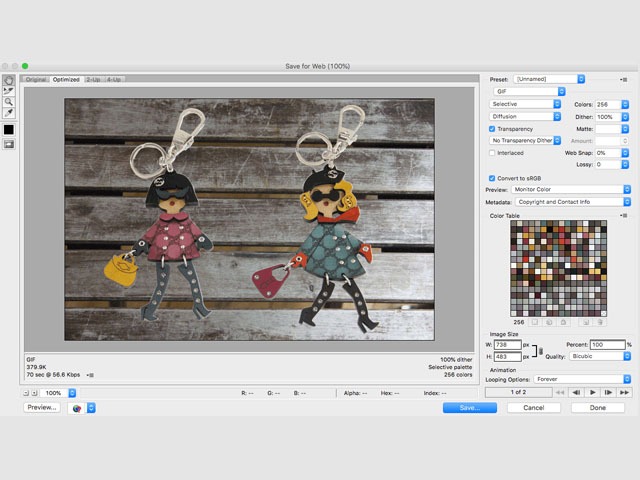
and Voila! Your GIF is ready.

Enjoy!
Read also: