How to create a rainbow effect in Photoshop?

How to create a rainbow effect in Photoshop? It’s easy! Follow the steps below and watch the video tutorial.

Rainbow Effect in Photoshop

In the first part of this tutorial we’ll create the rainbow, and in the second part rainbow effect letters.

Step 1.

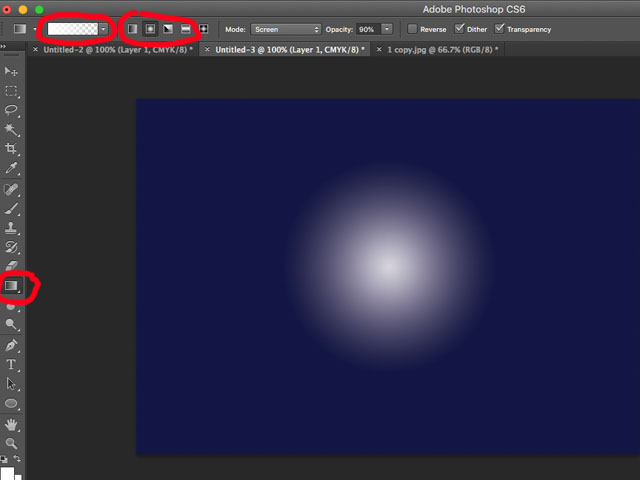
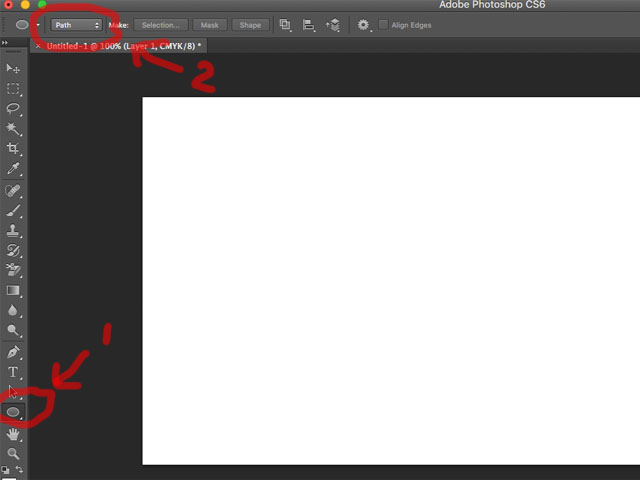
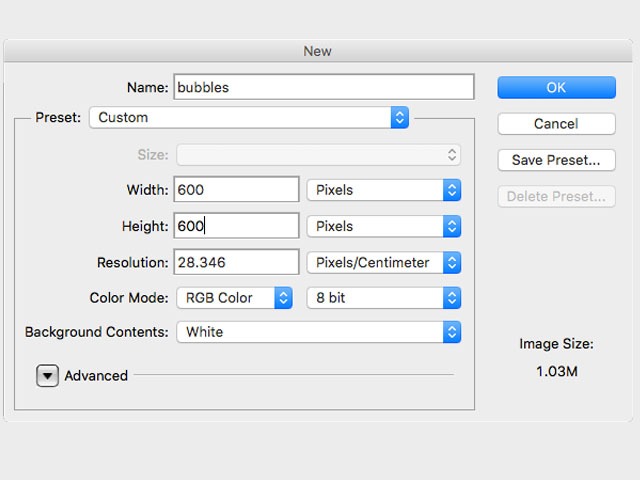
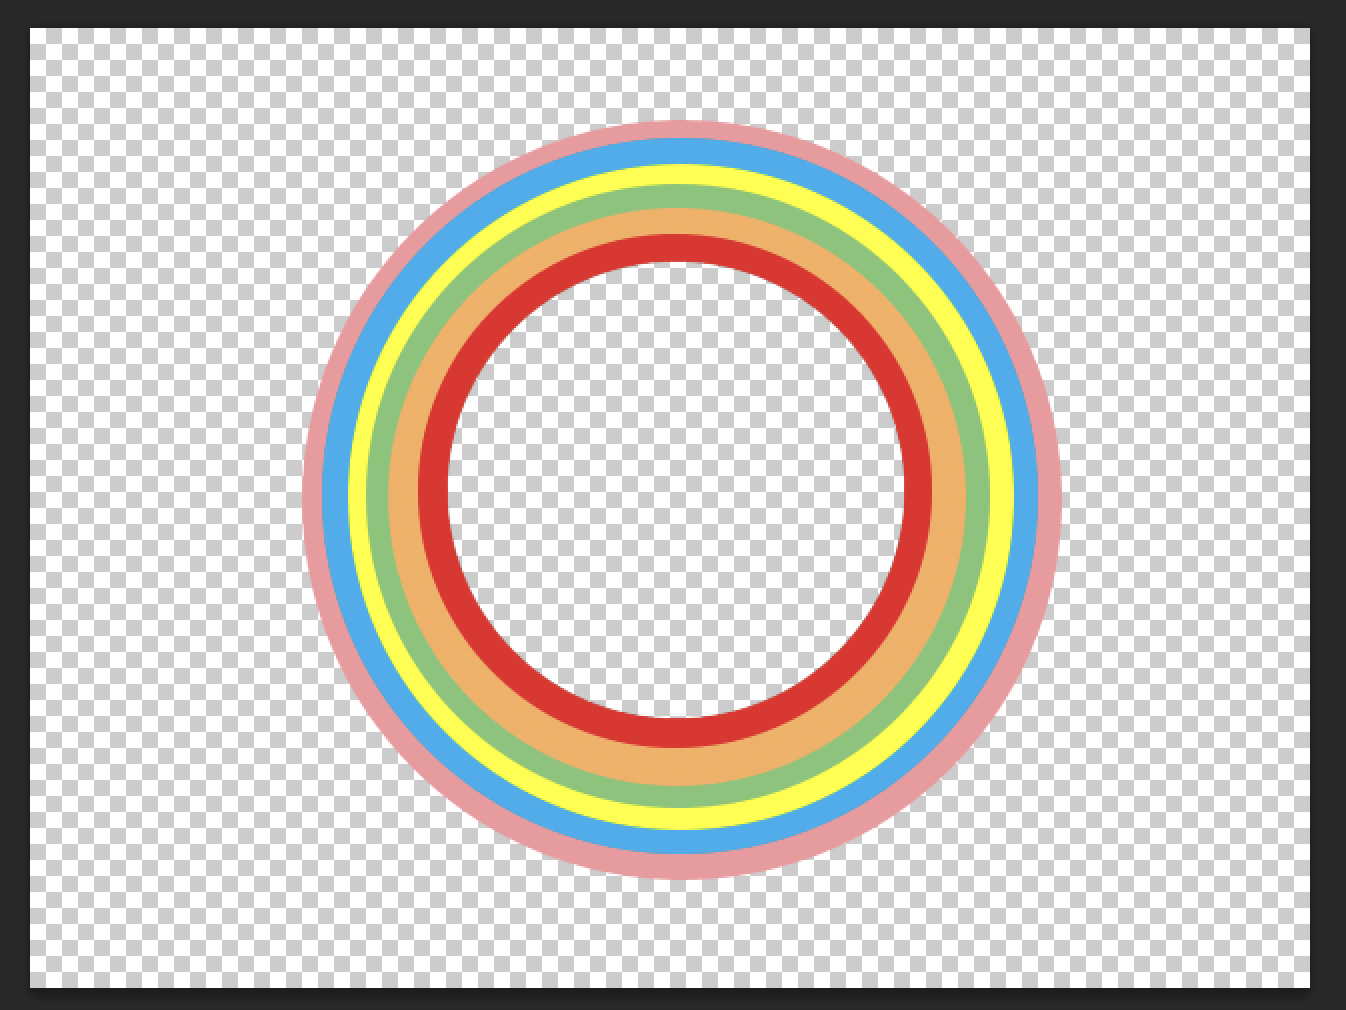
Create the new document, and by using Eclipse Tool draw seven circles in different colours.

Tip: Hold the shift key while drawing your circle and it will keep perfect proportions.
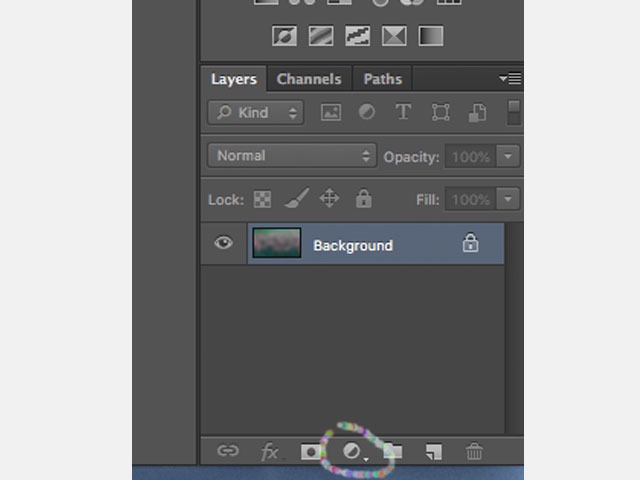
Rainbow effect Photoshop
rainbow Photoshop

Step2.

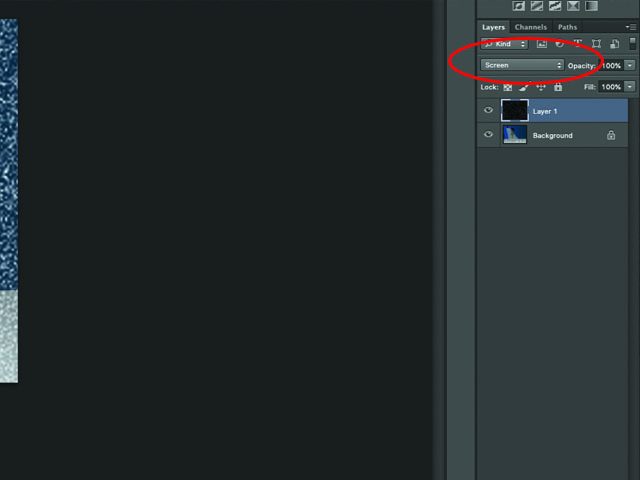
On the layer panel, click on the eyeball to hide the background.

Rainbow in Adobe Photoshop

Hit the right mouse button on the first eclipse and select “Merge Visible“.

Rainbow Effect

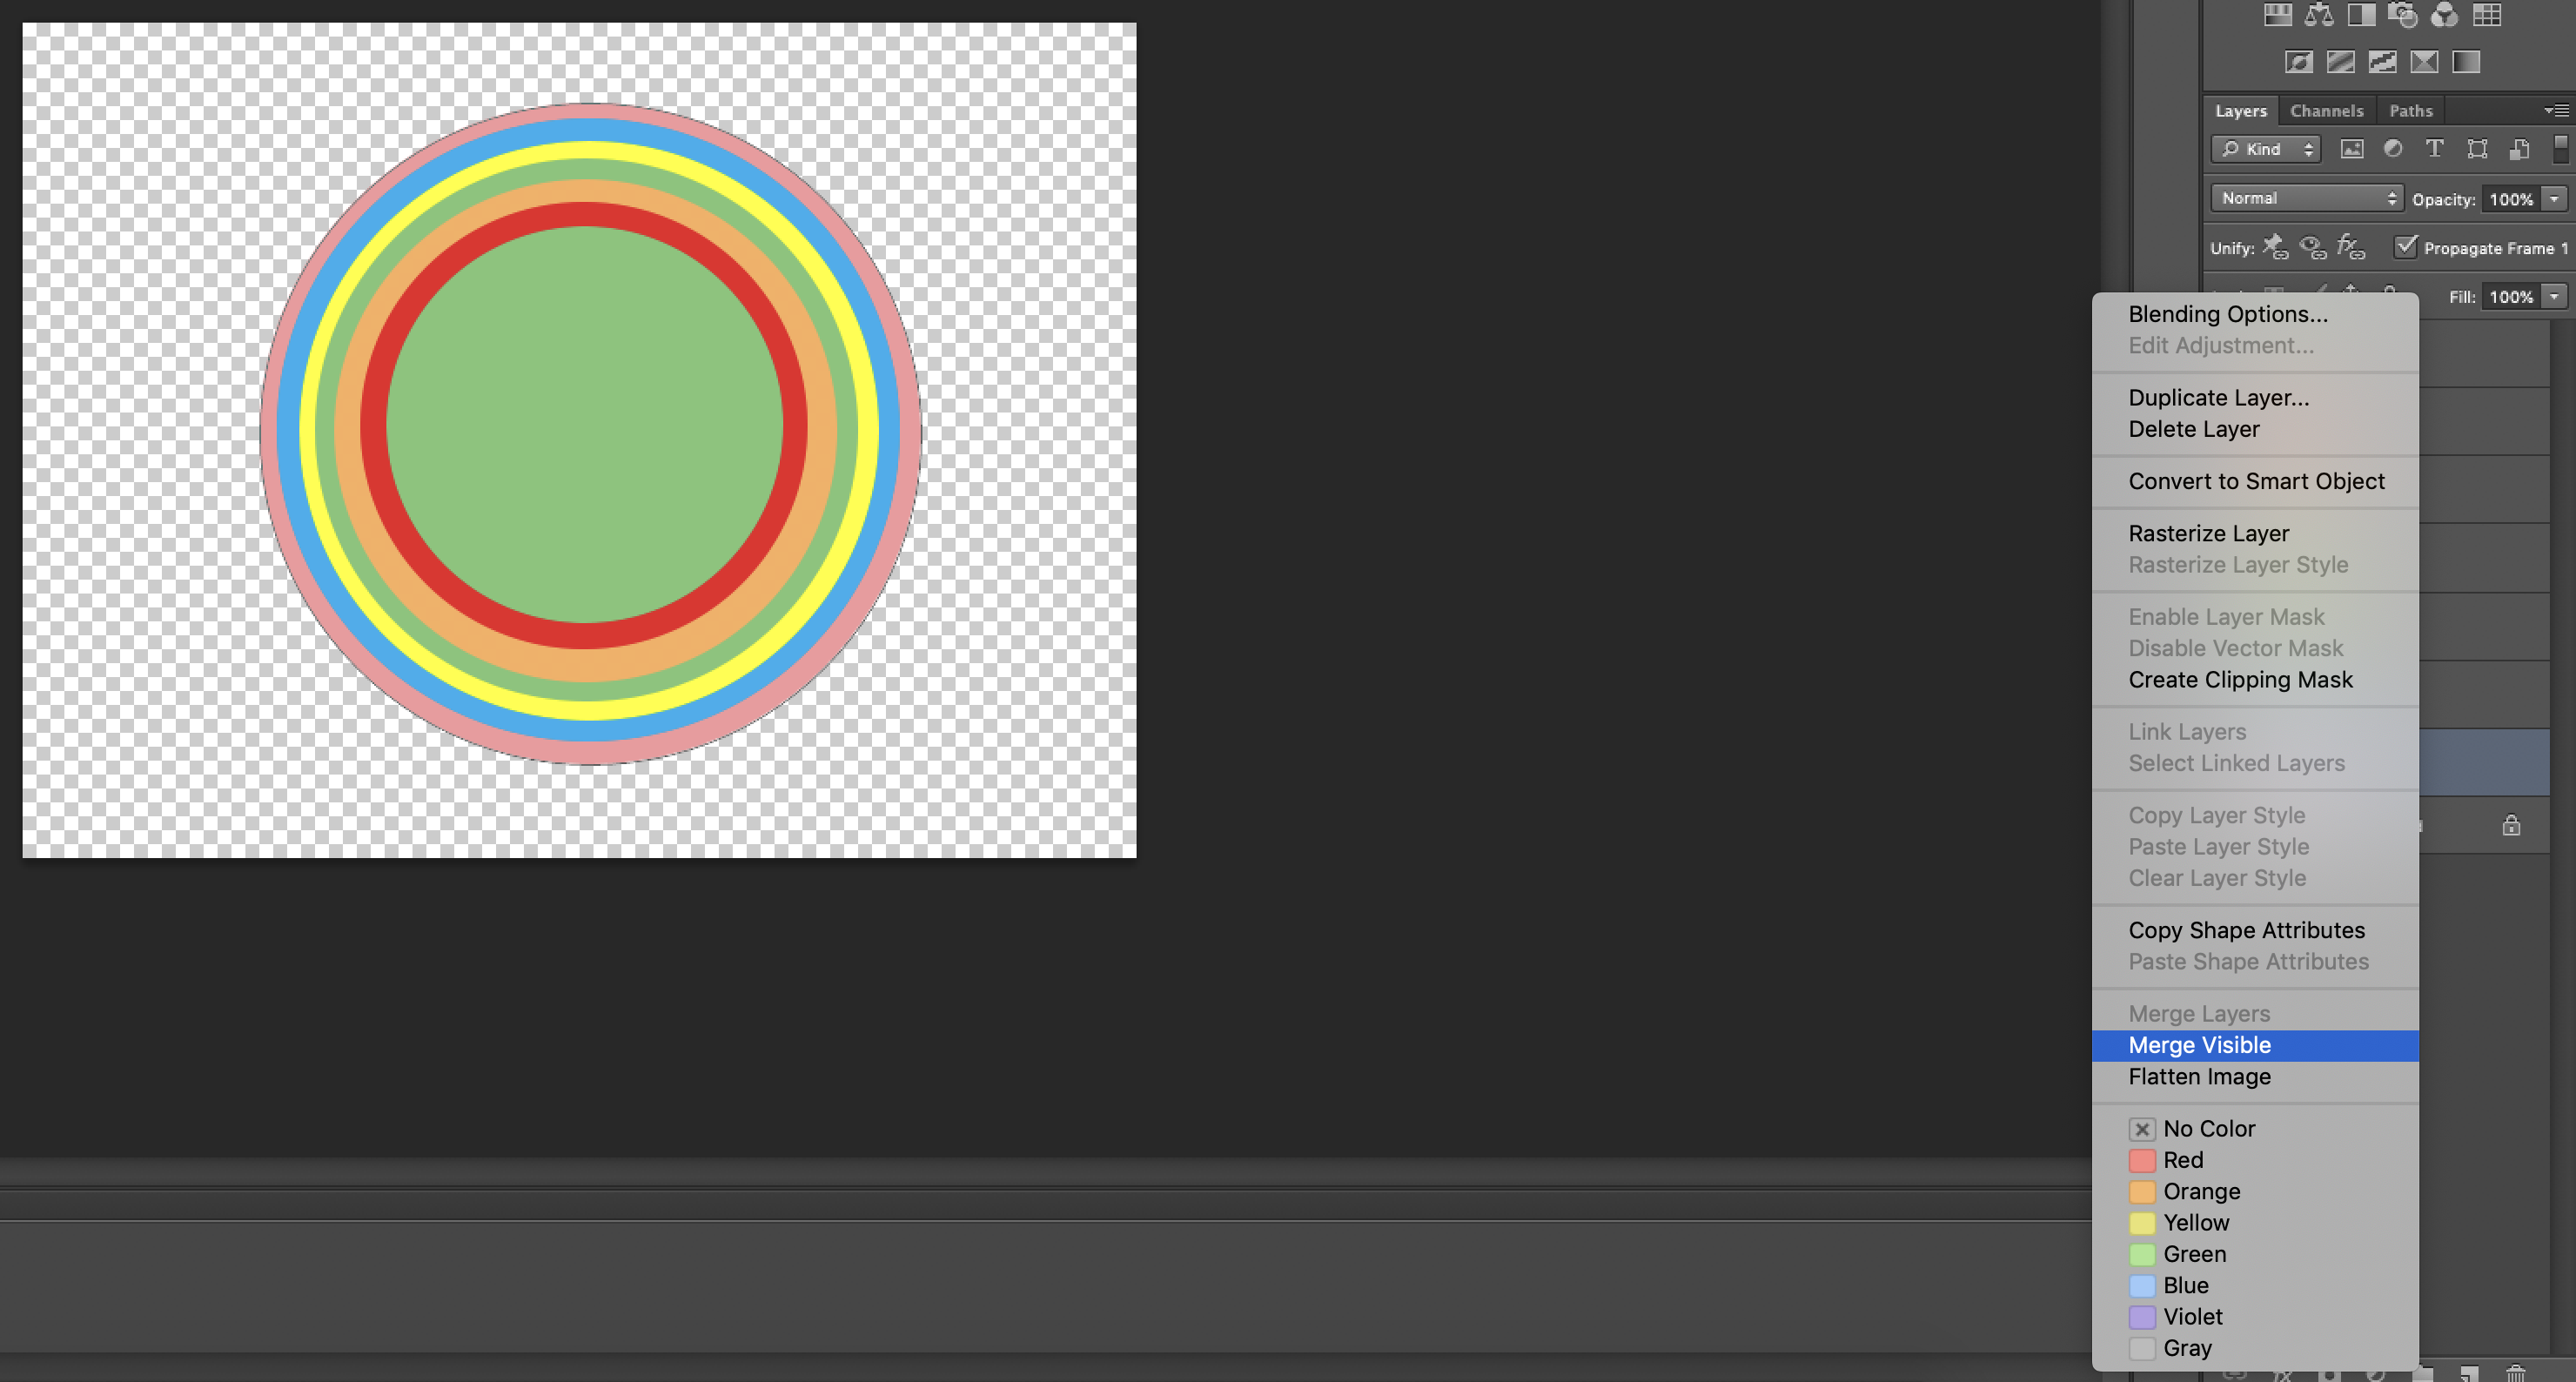
You can notice the all seven circles merged in one layer (rainbow layer):

Rainbow Photoshop

Step 3.

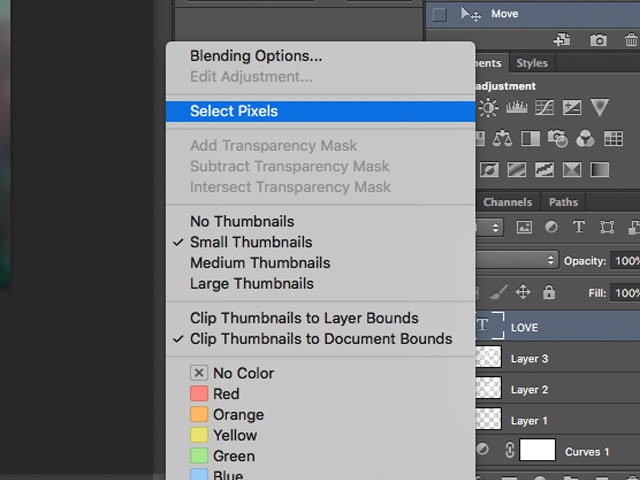
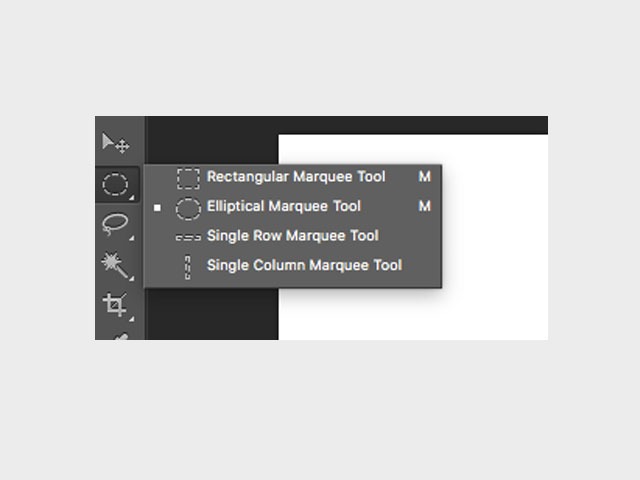
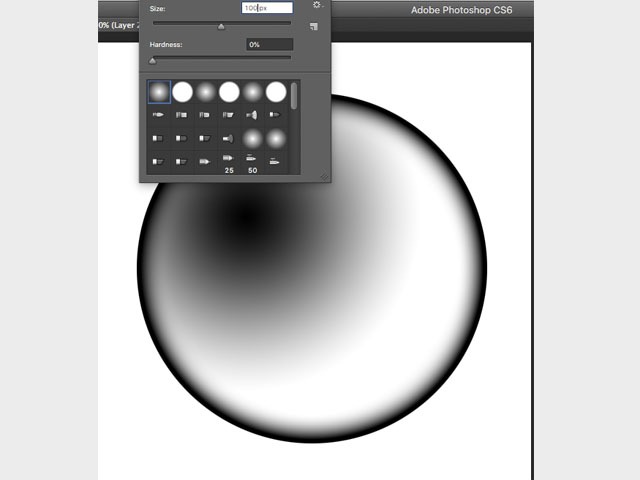
Select the Magic Wand Tool and click on the eclipse in the middle of the circle.

Rainbow Effect Photoshop

and hit the delete key.

Rainbow Adobe Photoshop

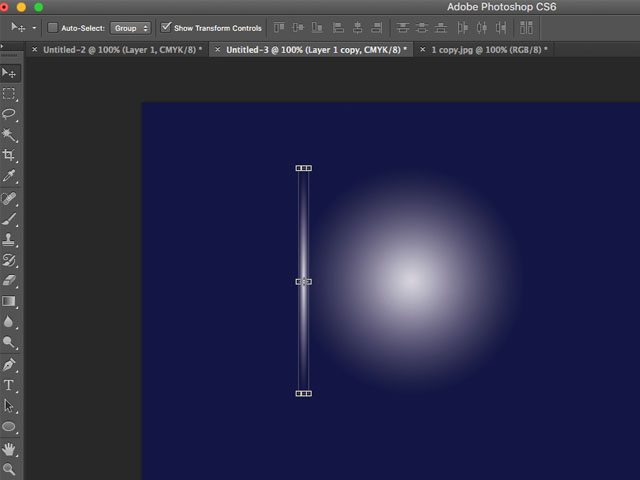
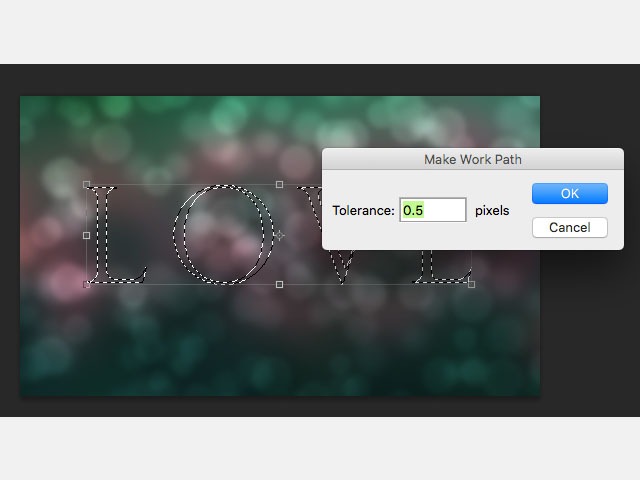
Use Rectangular Marquee Tool and select around half of our circle and hit the delete key.

Rainbow Adobe Phtoshop
Rainbow in Phtoshop

Step 4.

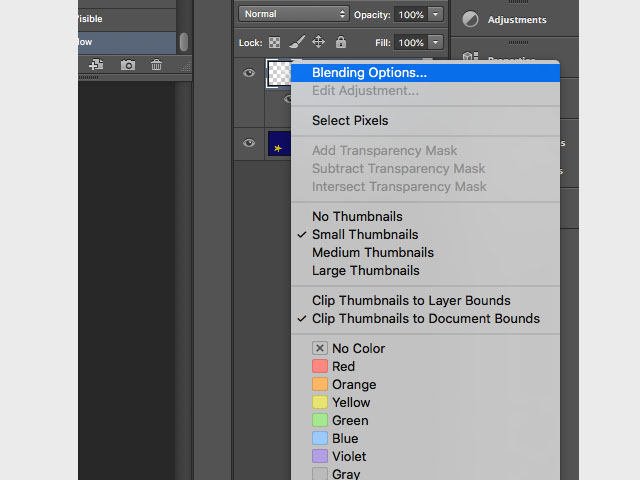
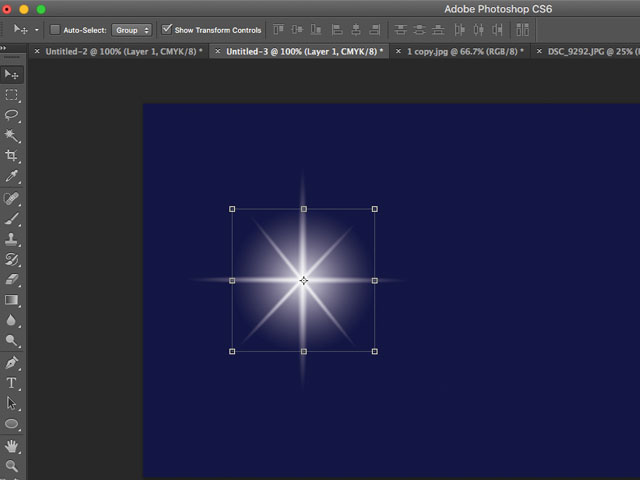
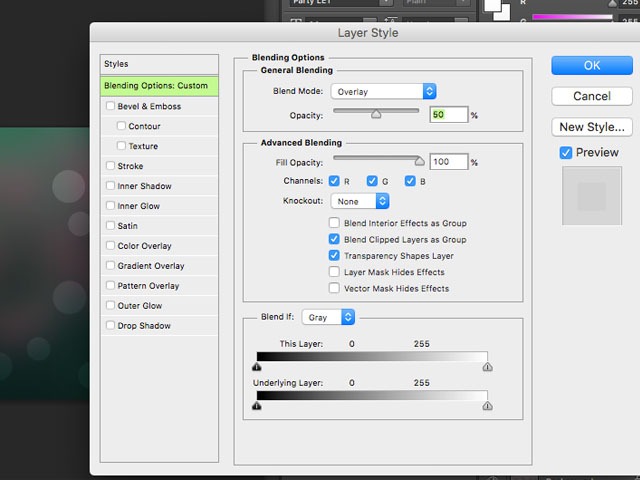
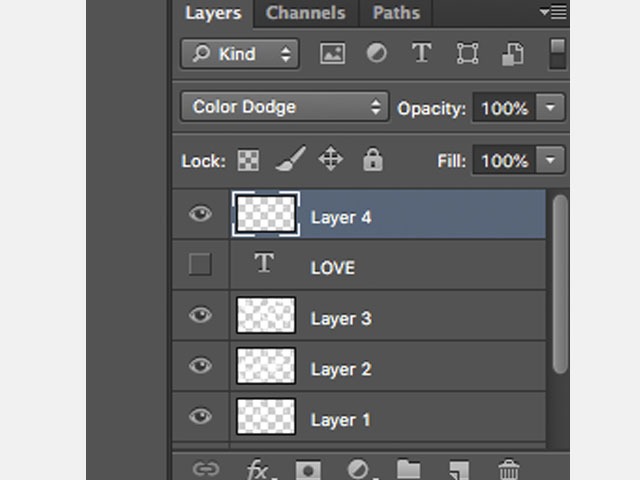
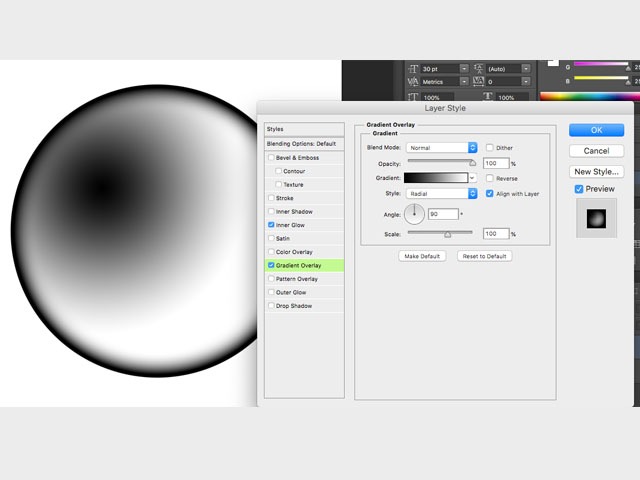
By clicking the right mouse button on the rainbow layer choose Blending Options…

Rainbow in Adobe Photoshop

Tick Bevel & Emboss, and Contour. Change the Highlight Mode to Color Dodge:

Rainbow Photoshop
Rainbow Adobe Photoshop

Your rainbow is ready. Add background and style the image as you like.

Rainbow Adobe Photoshop

Let’s add some rainbow text to our rainbow image.

Step1.

Create a new document, and draw colourful squares all over.
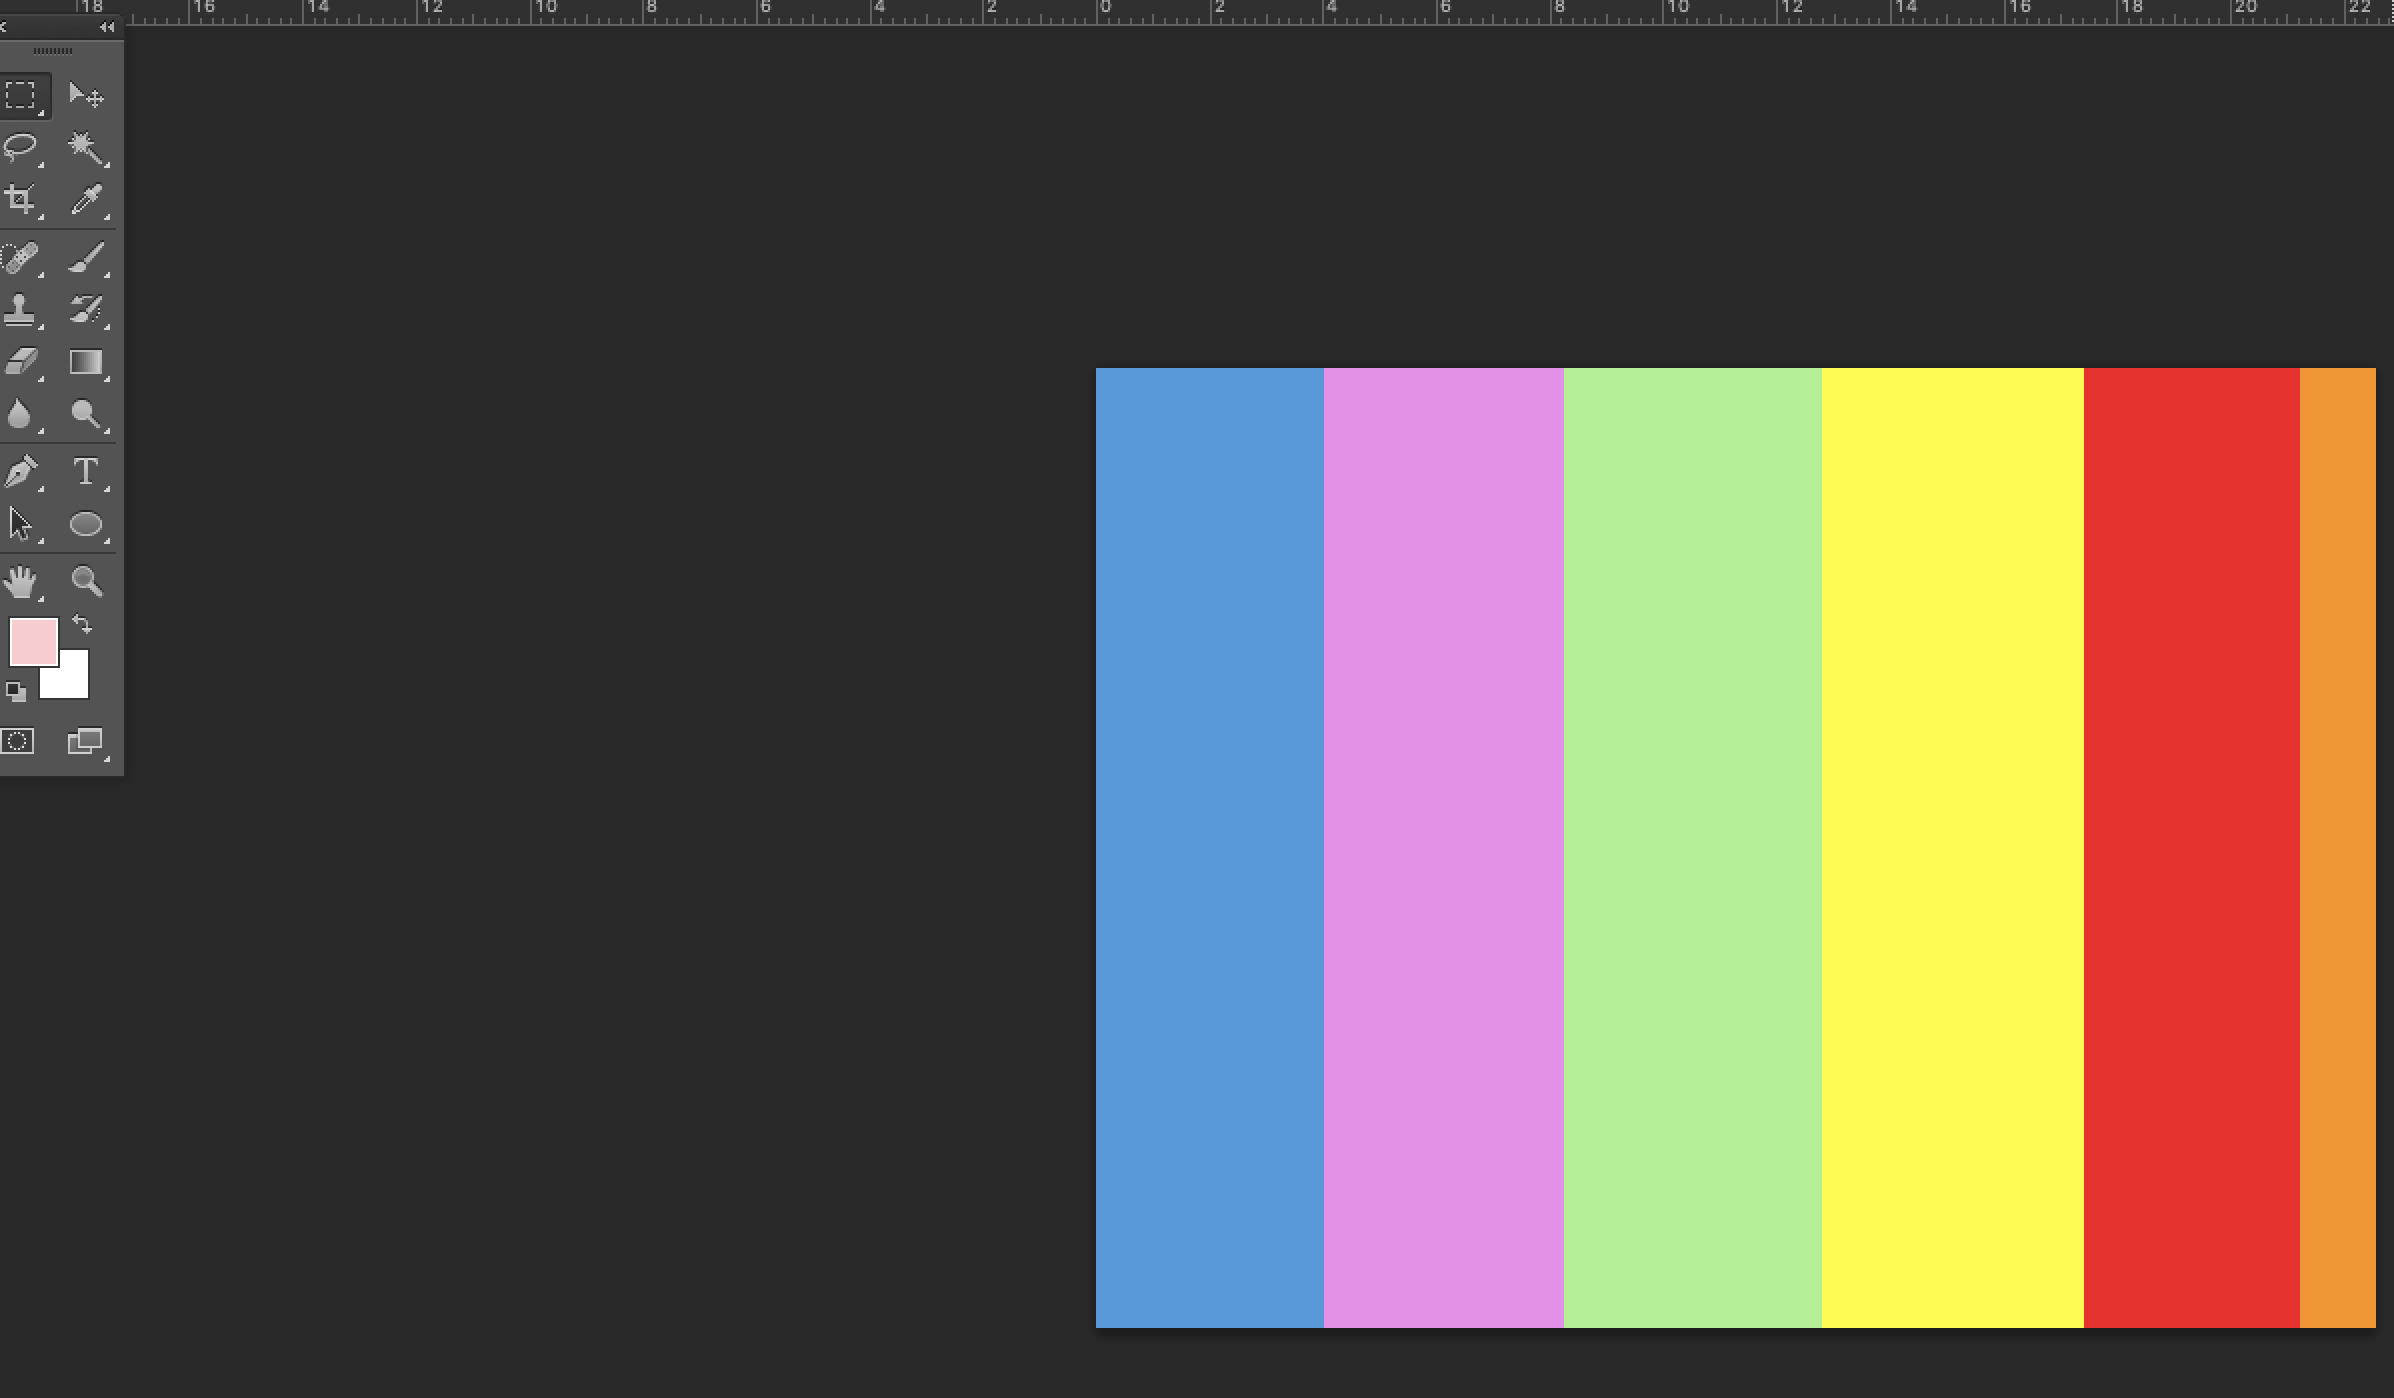
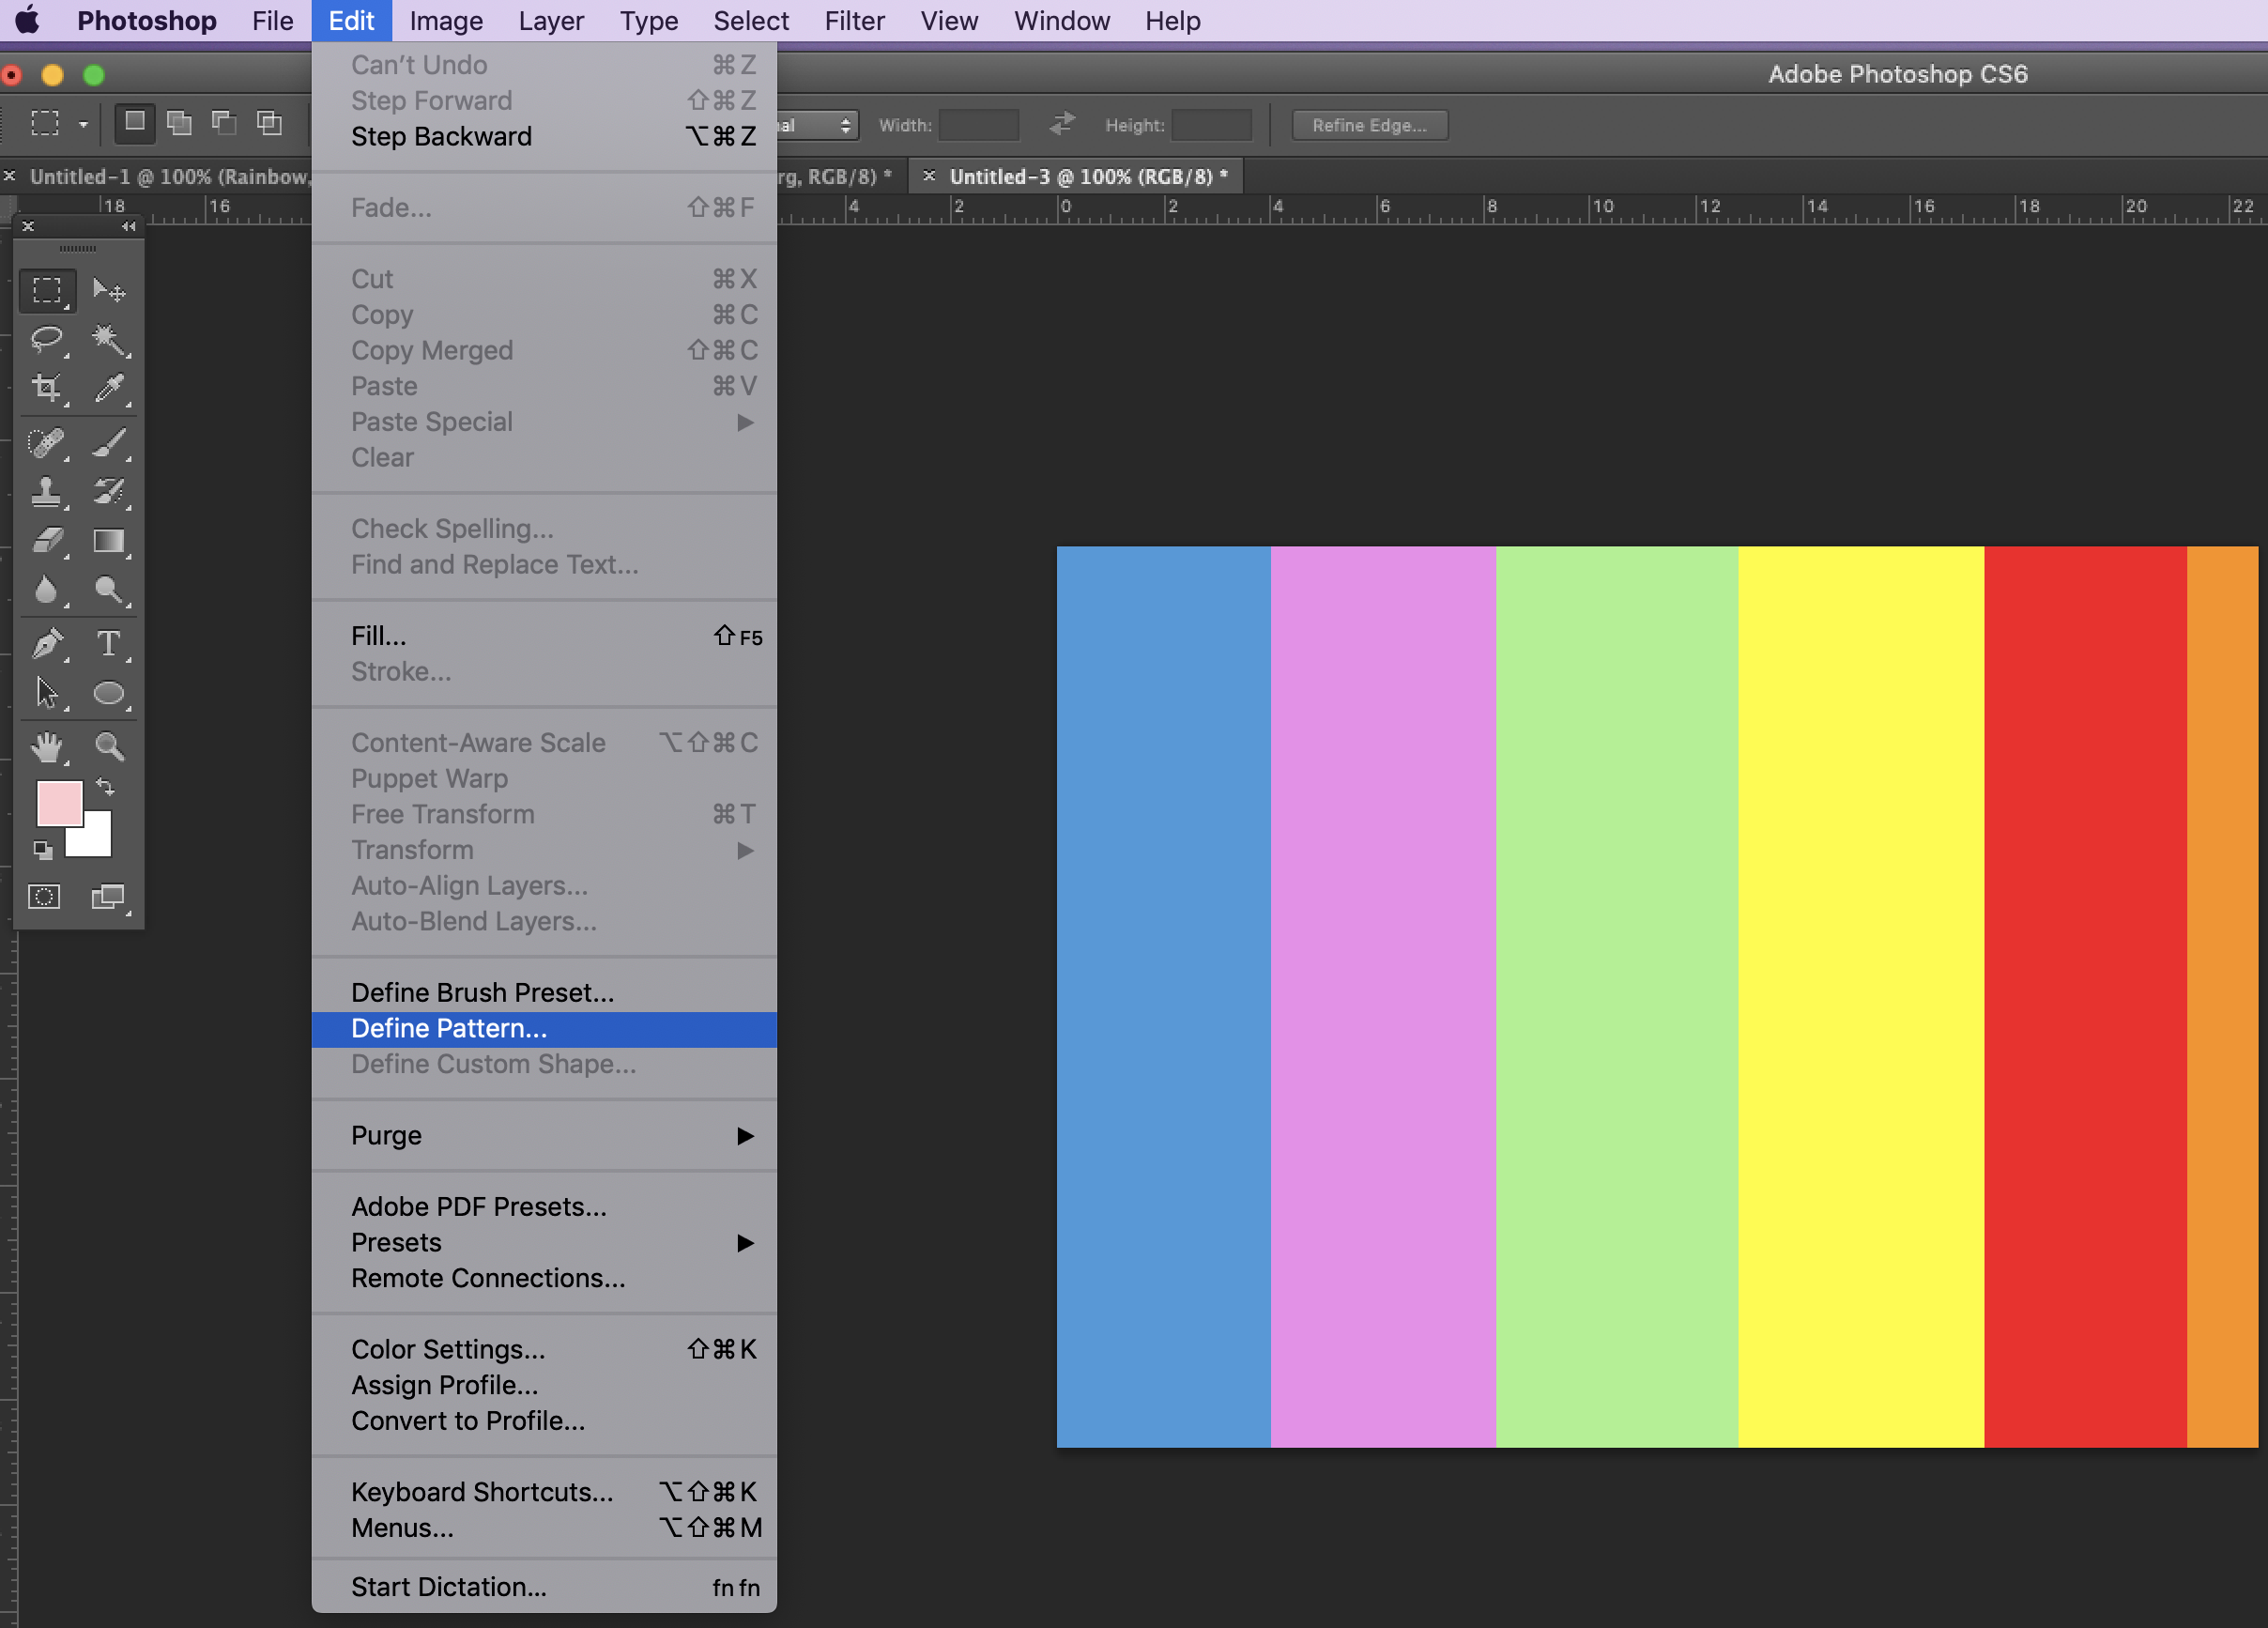
Rainbow text Adobe Photoshop

Step2.

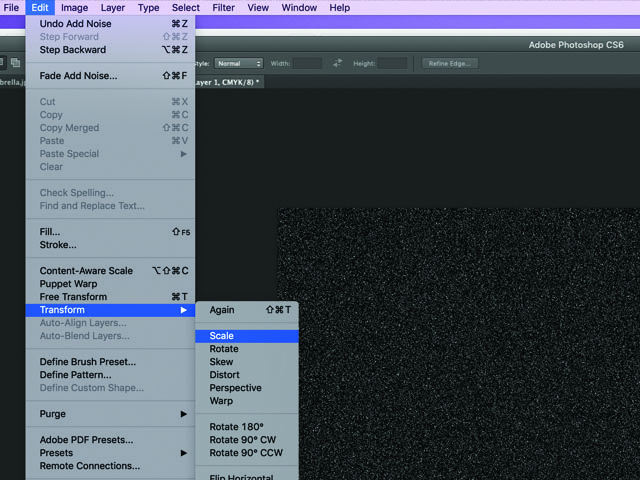
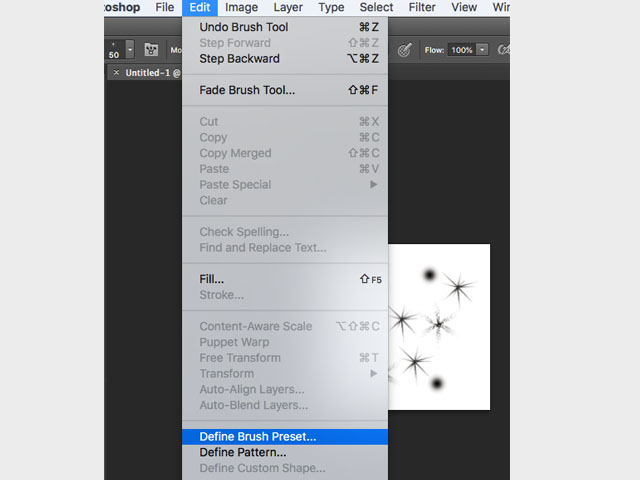
Go to Edit->Define Pattern…

Rainbow Text Effect Adobe Photoshop
Rainbow Text Photoshop

Step 3.

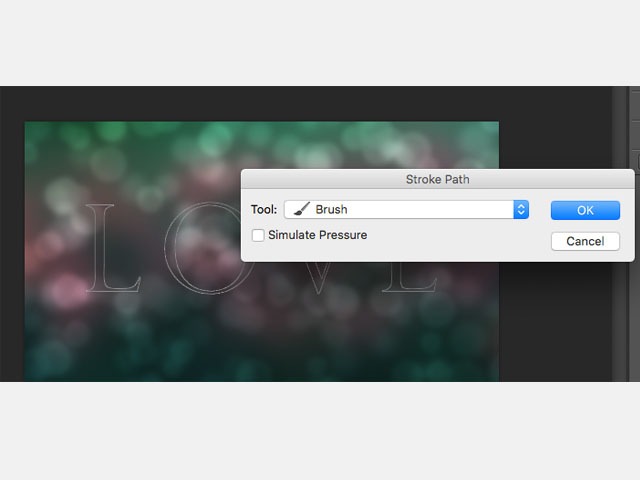
Use Horizontal Type Tool, choose the font and font size and type your text on your rainbow image:

Rainbow text effect Photoshop

Click by right mouse button on the text layer and select Blending Options…

Rainbow text

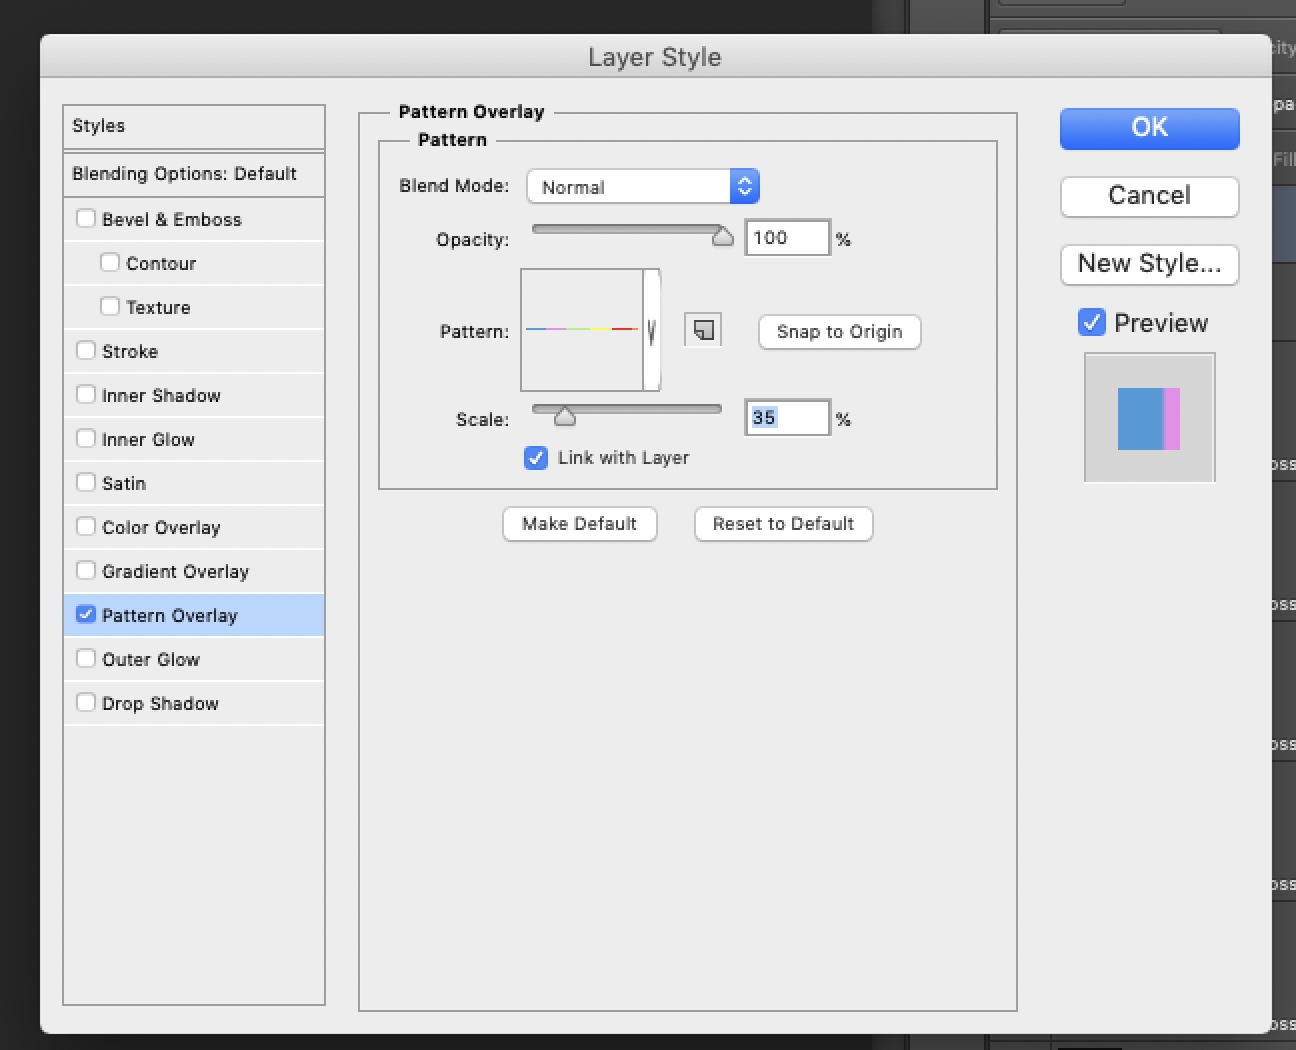
Select Pattern Overlay, click on Pattern and choose your new rainbow pattern.

Rainbow Effect Photoshop

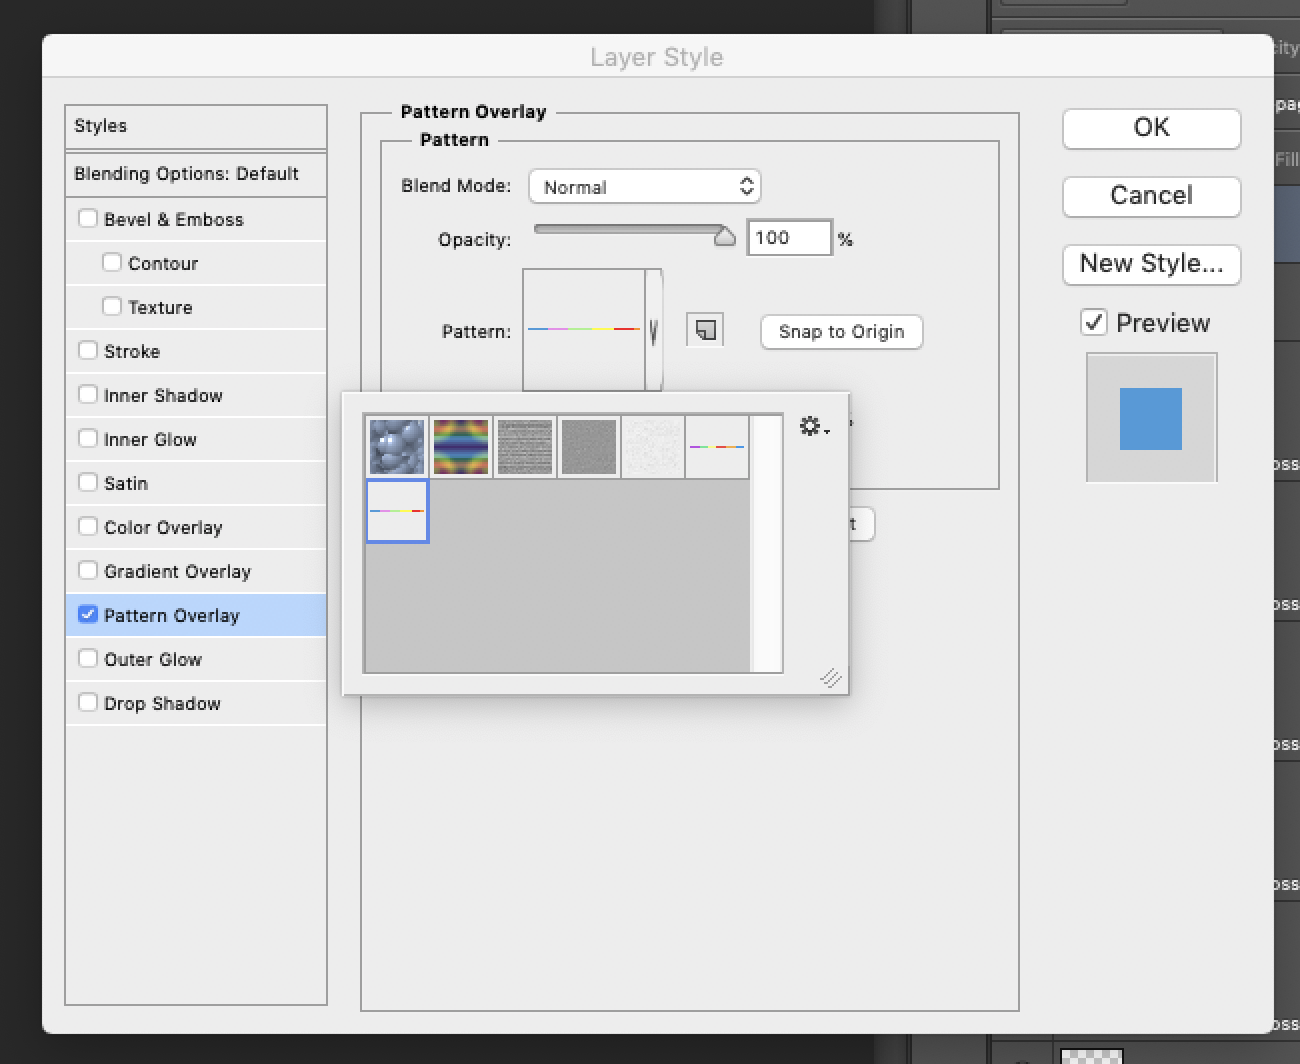
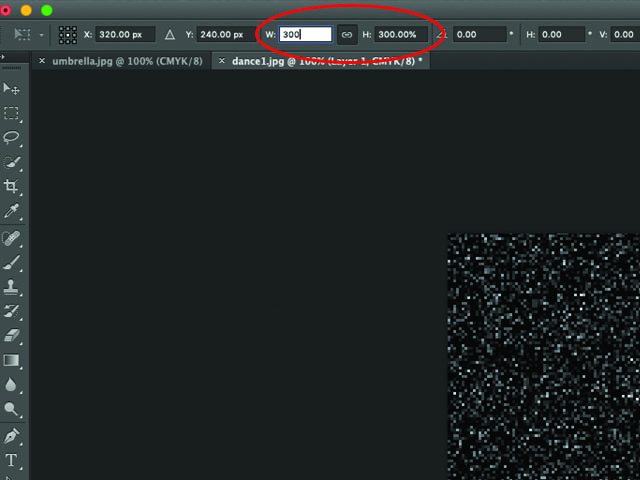
Set the Scale to 35%:

Rainbow Photoshop

Select Bevel & Emboss, and Contour.

Rainbow Text Photoshop

Ready!

Rainbow Text and Rainbow

Watch also the video tutorial:

Read also:

Photoshop Tutorials

How to create Bubbles in Photoshop?

How to add a Rain Effect to the image in Photoshop?

Rain Effect in Photoshop

In this tutorial, I’ll show you how to add the rain effect to your image in Adobe Photoshop CS6. Follow the steps below and watch the video tutorial to style your photos and images.

We’ll start this tutorial with my image below. You can choose a photo of umbrellas, dancers, or just style your own pictures.

Rain Effect

Step 1.

Open your image/photo.

Add a new layer to your image and fill it in black.

Rain Effect

Step 2.

Go to the Filter=>Noise=>Add Noise…

Rain in Photoshop

In the Add Noise dialog box, set the Amount to 25%, tick the Gaussian option and the Monochromatic option.

Rain Effect

Step 4.

Go to Edit=>Transform=>Scale…

Rain Effect in Adobe Photoshop

In the options bar, set the width and height to 300px.

Rain Effect Photoshop

Step 5.

Change the Blend mode to Screen.

Rain Effect in Photoshop
Rain Effect in Adobe Photoshop

Step 6.

Click the right mouse button on your Rain layer and select the Convert to Smart Object option.

Rain Effect in Adobe Photoshop

Step 7.

Go to Filter=>Blur=>Motion Blur, and set the angle to 65 degrees and distance to 75px.

How to create a rain effect in Adobe Photoshop?
Rain Effect Adobe Photoshop

Step 8.

Add the Layer Adjustment. Choose Level adjustment layer from the list.

Rain Effect

Create the clipping mask and set the values like on the picture below:

Rain Effect in Photoshop

The rain effect has more contrast now. Your picture is ready!

Rain Effect Photoshop

Watch also the video tutorial:

Read also:

How to create an Easter Egg in Photoshop?

How to make an animated GIF in Photoshop?

How to make a Star shape and a Triangle shape in Photoshop?

Hello! In this tutorial, I’ll show you how to create a star shape and a triangle shape in Photoshop CS6. Follow the easy steps below, and watch the video tutorial.

Edit: See also the Custom Shapes in Photoshop: Star, Triangle, Heart & more here, and here.

Star Shape and Triangle Shape in Photoshop

Step 1. STAR

Create a new document and choose the Polygon Tool (U).

Star Shape and Triangle Shape in Photoshop

Set the stroke black and fill yellow (if you want your star stroked and filled).

Star Shape and Triangle Shape in Photoshop

On the right side of the Polygon Tool panel set sides to 5, and by pressing the screw shape button, choose an option star. You can draw now your star:

Star Shape Photoshop

Step 2. TRIANGLE

Create a new document and choose the Polygon Tool (U).

Set the stroke black and fill red (choose colours which you like).

On the right side of the Polygon Tool panel set sides to 3, and by pressing the screw shape button, untick an option star. You can draw now your triangle:

Triangle Shape in Photoshop
Triange shape in Photoshop

Watch also the video tutorial:

Read also:

Custom Shapes in Photoshop: Star, Triangle, Heart & more

How to create the Gradient Text Effect in Photoshop?

How to make a sparkle brush in Photoshop?

How to make a sparkle brush in Photoshop?

Do you want to create your own sparkle brush? Follow the easy steps below and watch the video tutorial, and start styling your pictures!

Photoshop Sparkle Brush

Let’s start!

Step 1.

Create a new document. Set the size 200px x 200px and make sure the background color is white.

Step 2.

Go to the Brush Tool, set the foreground colour to black. Select the “Star 70px” brush and add a few sparkles.

Adobe Photoshop Sparkle Brush

Step 3.

Go to the Brush Tool. Select the “Soft Round Pressure Opacity” brush. Set the size 17px and add more sparkles.

Sparkles photoshop

Step 4.

Go to the Brush Tool. Click on the right top corner of the brush panel and select Assorted Brushes and press Append.

Adobe Photoshop Sparkles

Step 5.

Go to the Brush Tool. Select the “Starburst-small” brush and set the size 50px, and add again more sparkles.

How to make a sparkle brush in Photoshop?

Step 6.

Go to Edit->Define Brush Preset.. and give the name of your new brush (for example – sparkle brush).

How to make a sparkle brush in Photoshop?

Step 7.

Open your picture in which you want to style and create a new layer. Set the color of the foreground to white.

Step 8.

Go to the Brush Tool, and click on Toggle the Brush Panel.

Photoshop Sparkle brush

Go to Shape Dynamics and set the Size Jitter control to Fade: 25.

Sparkle brush Photoshop

Go to Brush Tip Shape and set the spacing to 50%.

Adobe Photoshop Sparkle Brush

Step 9.

Use your brush on the new layer and style your picture.

Sparkles Photoshop

Step 10.

Add some glow to your sparkles. Hit the right mouse button on your sparkle layer and select Blending Options…

Adobe Photoshop Sparkles

Go to Outer Glow, set the Opacity to 50%, and choose the glow colour.

Sparkling brush Photoshop

Ready!

Sparkles Adobe Photoshop

Watch also the video tutorial:

Hey, here’s something that might interest you:

How to create a sparkle effect in Photoshop?

How to create a rainbow effect in Photoshop?

How to make an animated GIF in Photoshop?

How to create a sparkle effect in Photoshop?

In this tutorial, you will learn how to create a sparkle effect in Photoshop CS6. Follow the steps below and watch the video tutorial and start making your own sparkles!

Sparkles in Photoshop

Step 1.

Create a new document and make a background in a dark color.

Sparkle Effect in Adobe Photoshop

Add a new layer and use the option Gradient Tool. In the middle of the layer draw a short line.

How to create a sparkle effect in Photoshop?

Step 2.

Duplicate layer and change the shape of your layer, like on the picture below.

Sparkle Effect in Adobe Photoshop
How to create a sparkle effect in Photoshop?

Step 3.

Duplicate a few times more a layer and make “star shape”.

Sparkle Effect in Adobe Photoshop

Drag the first layer with the gradient to the back of “star shape”. Hide by pressing eyeball background and in the layer panel select the option Merge Visible.

Sparkle Effect in Adobe Photoshop

Your sparkle is ready to use!

Sparkle Effect in Adobe Photoshop

Watch also video tutorial:

Hey, here’s something that might interest you:

How to make a sparkle brush in Photoshop?

How to create the Gradient Text Effect in Photoshop?

How to create an Easter Egg in Photoshop?

How to make a circle text in Photoshop?

To learn how to create a circle text in Photoshop follow the steps below and watch the video tutorial.

Circle text in Photoshop

Step 1.

Create a new document. Select the Eclipse tool and choose Path in the options bar.

Photoshop type text in the circle

Step 2.

Draw the circle (holding shift key). Select the Type Tool and press over the path. You can write your text in the circle now!

circle text Photoshop
type in the circle

Watch also the video tutorial:

Read also:

Custom Shapes in Photoshop: Star, Triangle, Heart & more

How to make an animated GIF in Photoshop?

How to create the Gradient Text Effect in Photoshop?

How to create a Bokeh Effect Wallpaper with text in Photoshop?

In this tutorial, you will learn how to create a Bokeh Effect Wallpaper with text in Photoshop CS6. The Bokeh Effect is the way a camera lens treats out-of-focus points of light. The term “Bokeh” comes from the Japanese word and means “blur” or “blur quality”. Follow the steps below and watch the video tutorial.

Bokeh Effect Photoshop

Step 1:


Open a colorful image that you’d like to use to create your Bokeh effect. Set the resolution on your image 150px and the size of your picture.

Photoshop Bokeh Effect

Step 2:


Go to Filter->Blur->Gaussian Blur and set the Radius to 65px and press Okay.

Bokeh Wallpaper
Bokeh Wallpaper Photoshop

Step 3:


We’ll darken the mid-tones by clicking on the adjustment layer and selecting Curves

Bokeh Effect Photoshop

Go to the center of the grid and pull it slightly down and to the right.

Bokeh Photoshop

Step 4:


Create a new layer and open the Brush Tool. Open Brush Panel and set up:
Size: 125pxHardness: 100%Spacing: 80%

Bokeh Wallpaper
Bokeh Wallpaper Photoshop

Click Shape Dynamics and make the:
Size Jitter: 50%

The control: FadeAngle

Jitter: 0%

Angle control: off

Bokeh Effect Photoshop

Go to Scattering. Make the Scatter 1000%. Count 1.

Bokeh Effect Photoshop

Step 5:


Now, randomly brush over your image. Change the Blend Mode to “Overlay” and reduce the opacity to 50%.

Bokeh Effect Adobe Photoshop

Go to Filter->Blur->Gaussian Blur. Blur it 16px and click Okay.

Step 6:


Click on the New Layer icon. Change the Blend Mode to “Overlay” and opacity to 50%, and randomly brush over the image.
Go to Filter->Blur->Gaussian Blur. Blur it 12px and click Okay.

Step 7:


Make a new layer, change Blend Mode to “Overlay” and opacity to 50%, and again randomly brush over the image.
Go to Filter->Blur->Gaussian Blur. Blur it 8px and click Okay.

Bokeh Wallpaper Adobe Photoshop

Next, I’ll show you how to add Bokeh text.

Step 1:


Open your “Horizontal Type Tool” and choose the thin font. Set the size around 190px, and select the “sharp” option. Type out your text.

Bokeh Text Effect

Step 2:


Click by the right button of the mouse on the text layer and choose an option Select Pixels

Bokeh Text Effect Adobe Photoshop

Click off the eyeball to the text layer to hide it. Create a new layer.

Bokeh Text Adobe Photoshop

Step 3:


Open the Paths Panel and click on the icon of the upper right. Select Work Path and set 0.5px.

Bokeh Text Effect Photoshop
Bokeh Text Photoshop

Step 4:


Open your Brush Tool and open the Brush Tool Panel. Click “Brush Tip Shape” and make the size 30px, spacing 80% and hardness 100%.

Bokeh Text Effect Adobe Photoshop

Select Shape Dynamics and set the size Jitter 50% and control Off. Minimum diameter 0%. Uncheck Scattering.

Bokeh Text

Click Color Dynamics->Foreground/Background Jitter set to 100%.

Bokeh Text Adobe Photoshop

Transfer:

Opacity Jitter: 0%, control Off
Flow Jitter: 100%

Bokeh Text Effect Photoshop

Step 5:


Click on the icon at the upper right corner of the Paths panel and click Stroke Path.

Bokeh Photoshop

Choose Brush and make sure that “Simulate Pressure” is not checked.

Bokeh Adobe Photoshop

Step 6:


Open back the layers panel and change Blend Mode to Color Dodge. To hide the Work Path hit Cmd+H.

Bokeh adobe Photoshop

Create a copy of the layer. Choose Blending Options->Inner Glow and change the Blend Mode to Color Dodge, and opacity to 50%Source center and hit Okay. Go to Filter->Blur->Gaussian Blur. Blur it 4px and click Okay. Your Bokeh Effect Wallpaper is Ready!

Bokeh Effect Photoshop

You can see also the video tutorial below:

Enjoy!

Read also:

Photoshop Tutorials

How to create Bubbles in Photoshop?

How to make an animated GIF in Photoshop?

How to create Bubbles in Photoshop?

How to create Bubbles in Photoshop? That’s easy! Follow the tutorial below and learn how to create your own bubble brush. Let’s get it started!

fish and bubbles
Do you like this GIF? Check more GIFS in the store.

Follow the steps below, and watch the video tutorial.

Note: In this video, like in the tutorial on my web page I worked in Photoshop CS6 (this is my first video tutorial, so please bear with me).

Step 1: Create a new document.


Create a new document (the width 600px and the height 600px) with the background content- white.

Photoshop Bubbles

Step 2: Draw the shape of the bubble.


Select the Elliptical Marquee Tool. Drag a selection on the panel, which will become our basic shape of the bubble.

Tip: Holding the shift key makes the perfectly round shape of the bubble.

bubble brush photoshop

Step 3: Create a new layer.


In the Layer menu on the top of the screen choose New, and then choose Layer Via Copy.

bubble photoshop

On the layers panel, click on our new layer by the right mouse button and choose Blending Options.

bubbles photoshop

Step 4: Inner Glow.


The layers styles appeared. In the layers styles dialog box select the Inner Glow option and change the Blend Mode to Multiply. Click on the color swatch below and change the color to black from the color picker. Set the element size to around 40px.

bubbles adobe Photoshop

Step 5: Gradient Overlay 


Add Gradient Overlay. Click on the Gradient preview bar and select black to white gradient (3rd in the row). Change the style to Radial and click on the black spot and then drag it to the left top. Click Okay.

bubble brush

Step 6: Select the brush


Set your brash to the soft round (first brush) and the size around 100px. Create a new layer and make a dot. Go to the Filter menu and select Distort, and then Twirl. Set the angle and click Okay. Adjust new shape as you like.

bubbles tutorial
bubbles Photoshop tutorial
bubble brush tutorial

Step 7: Almost ready!


From the Edit menu select Define Brush Preset and give it the name…and Voila! You can use your new bubble brush.

bubble brush photoshop tutorial

Tip: Go to the Window panel and open Brush panel, you can adjust the shape, or position of your bubbles. Change the brush color to white and start drawing 🙂

bubbles in photoshop

Enjoy!

Read also:

Photoshop Tutorials

How to add a Rain Effect to the image in Photoshop?