Categories
Web development

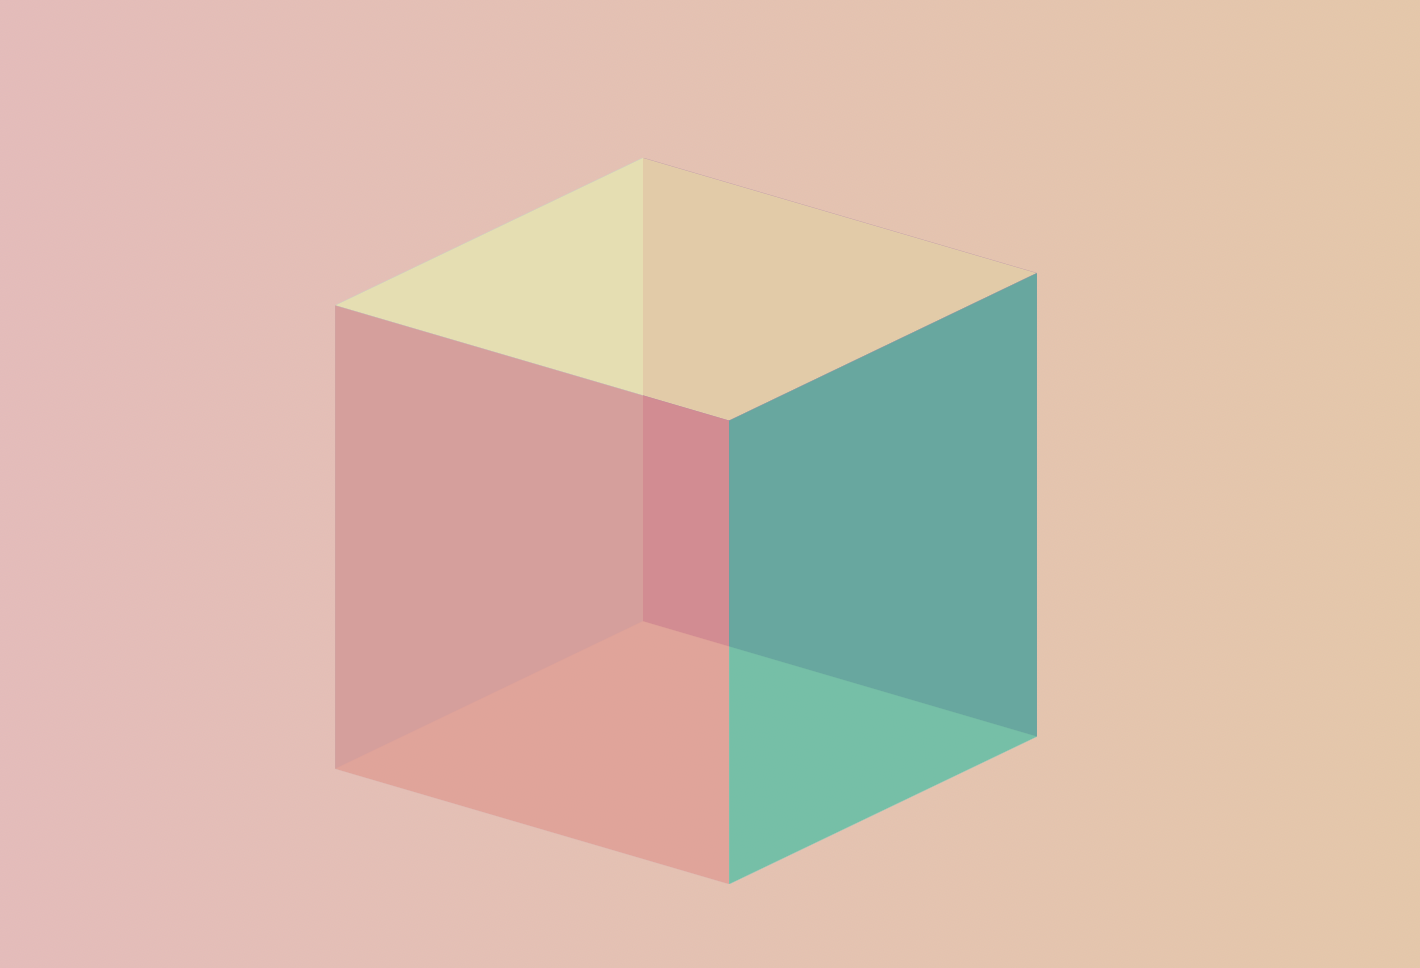
CSS & jQuery 3d Cube

3d Cube

Demo:

*the cube is gonna rotate with the move of the mouse.
*to see the CSS & jQuery 3d Cube on the website click here.

What do you need to do?

To create the CSS & jQuery rotating cube follow the steps below:

  1. Add HTML
  2. Add CSS
  3. Add JavaScript/jQuery

Step1.

Add HTML

Each cube has 6 sides. We need to create them in HTML:

<div id="wrap">
    <div id="D3Cube">
        <div id="side1"></div>
        <div id="side2"></div>
        <div id="side3"></div>
        <div id="side4"></div>
        <div id="side5"></div>
        <div id="side6"></div>
    </div>
</div>

Step2.

Add CSS

body {
  background: linear-gradient(90deg, rgba(238,174,202,1) 0%, rgba(233,210,148,1) 100%);
  height:100vh;
  display:flex;
  justify-content: center;
  align-items: center;
}

#wrap {
    position:relative;
}
#D3Cube {
    position: relative;
    width: 250px;
    height: 250px;
    transform-style: preserve-3d;
    -moz-transform-style: preserve-3d;
    -webkit-transform-style: preserve-3d;
    transform: rotateX(-22deg) rotateY(-38deg) rotateZ(0deg);
    -moz-transform: rotateX(-22deg) rotateY(-38deg) rotateZ(0deg);
    -webkit-transform: rotateX(-22deg) rotateY(-38deg) rotateZ(0deg);
    -moz-transform-style: preserve-3d;
    transform-style: preserve-3d;
    -webkit-transition: all 0.5s ease-in-out;
    transition: all 0.5s ease-in-out;
}
#D3Cube > div {
    position: absolute;
    -webkit-transition: all 0.5s ease-in-out;
    transition: all 0.5s ease-in-out;
    width: 250px;
    height: 250px;
    float: left;
    overflow: hidden;
    opacity: 0.8;
}
#side1 {
    transform: rotatex(90deg) translateX(0px) translateY(0px) translateZ(125px);
    -moz-transform: rotatex(90deg) translateX(0px) translateY(0px) translateZ(125px);
    -webkit-transform: rotatex(90deg) translateX(0px) translateY(0px) translateZ(125px);
    background-color: #F9E79F;
}
#side2 {
    transform: rotateY(-90deg) translateX(0px) translateY(0px) translateZ(125px);
    -moz-transform: rotateY(-90deg) translateX(0px) translateY(0px) translateZ(125px);
    -webkit-transform: rotateY(-90deg) translateX(0px) translateY(0px) translateZ(125px);
    background-color: #85C1E9;
}
#side3 {
    transform: translateX(0px) translateY(0px) translateZ(125px);
    -moz-transform: translateX(0px) translateY(0px) translateZ(125px);
    -webkit-transform: translateX(0px) translateY(0px) translateZ(125px);
    background-color: #F1948A;
}
#side4 {
    transform: rotateY(90deg) translateX(0px) translateY(0px) translateZ(125px);
    -moz-transform: rotateY(90deg) translateX(0px) translateY(0px) translateZ(125px);
    -webkit-transform: rotateY(90deg) translateX(0px) translateY(0px) translateZ(125px);
    background-color: #1ABC9C;
}
#side5 {
    transform: rotateY(180deg) translateX(0px) translateY(0px) translateZ(125px);
    -moz-transform: rotateY(180deg) translateX(0px) translateY(0px) translateZ(125px);
    -webkit-transform: rotateY(180deg) translateX(0px) translateY(0px) translateZ(125px);
    background-color: #8E44AD;
}
#side6 {
    transform: rotateX(-90deg) translateX(0px) translateY(0px) translateZ(125px);
    -moz-transform: rotateX(-90deg) translateX(0px) translateY(0px) translateZ(125px);
    -webkit-transform: rotateX(-90deg) translateX(0px) translateY(0px) translateZ(125px);
    background-color: #D7DBDD;
   }
Step3.

Add JavaScript/jQuery

$(document).mousemove(function(e) {
  $('#3dCube').css('transform', 'rotateX(0deg) rotateY(0deg)');
  
  var rotate_X;
  var rotate_Y;
  var invert = false;
  
  if (invert) {
    rotate_X = e.pageX;
    rotate_Y = e.pageY;
  } else if (!invert) {
    rotate_X = e.pageX;
    rotate_Y = -e.pageY;
  }
  
  $('#D3Cube').css('transform', 'rotateX(' + rotate_Y + 'deg) rotateY(' + rotate_X + 'deg)')
});

Enjoy coding!

Read also:

CSS & JavaScript Memory Game

Heads or Tails? Toss a Coin!

CSS/JS Eye Follows Mouse Cursor + Blink on Hover

Categories
Web development

CSS Perspective Property, CSS Perspective-origin Property & 3d Cube

CSS Perspective property

Today we’ll talk about the CSS Perspective property, then we’ll go to the CSS Perspective-origin property and in the end, we’ll create the 3d cube using pure CSS.

  1. CSS Perspective property
  2. CSS Perspective-origin property
  3. 3d Cube

Click on/ drag to rotate the Cube:


1
6
4
3
5
2


CSS Perspective Property

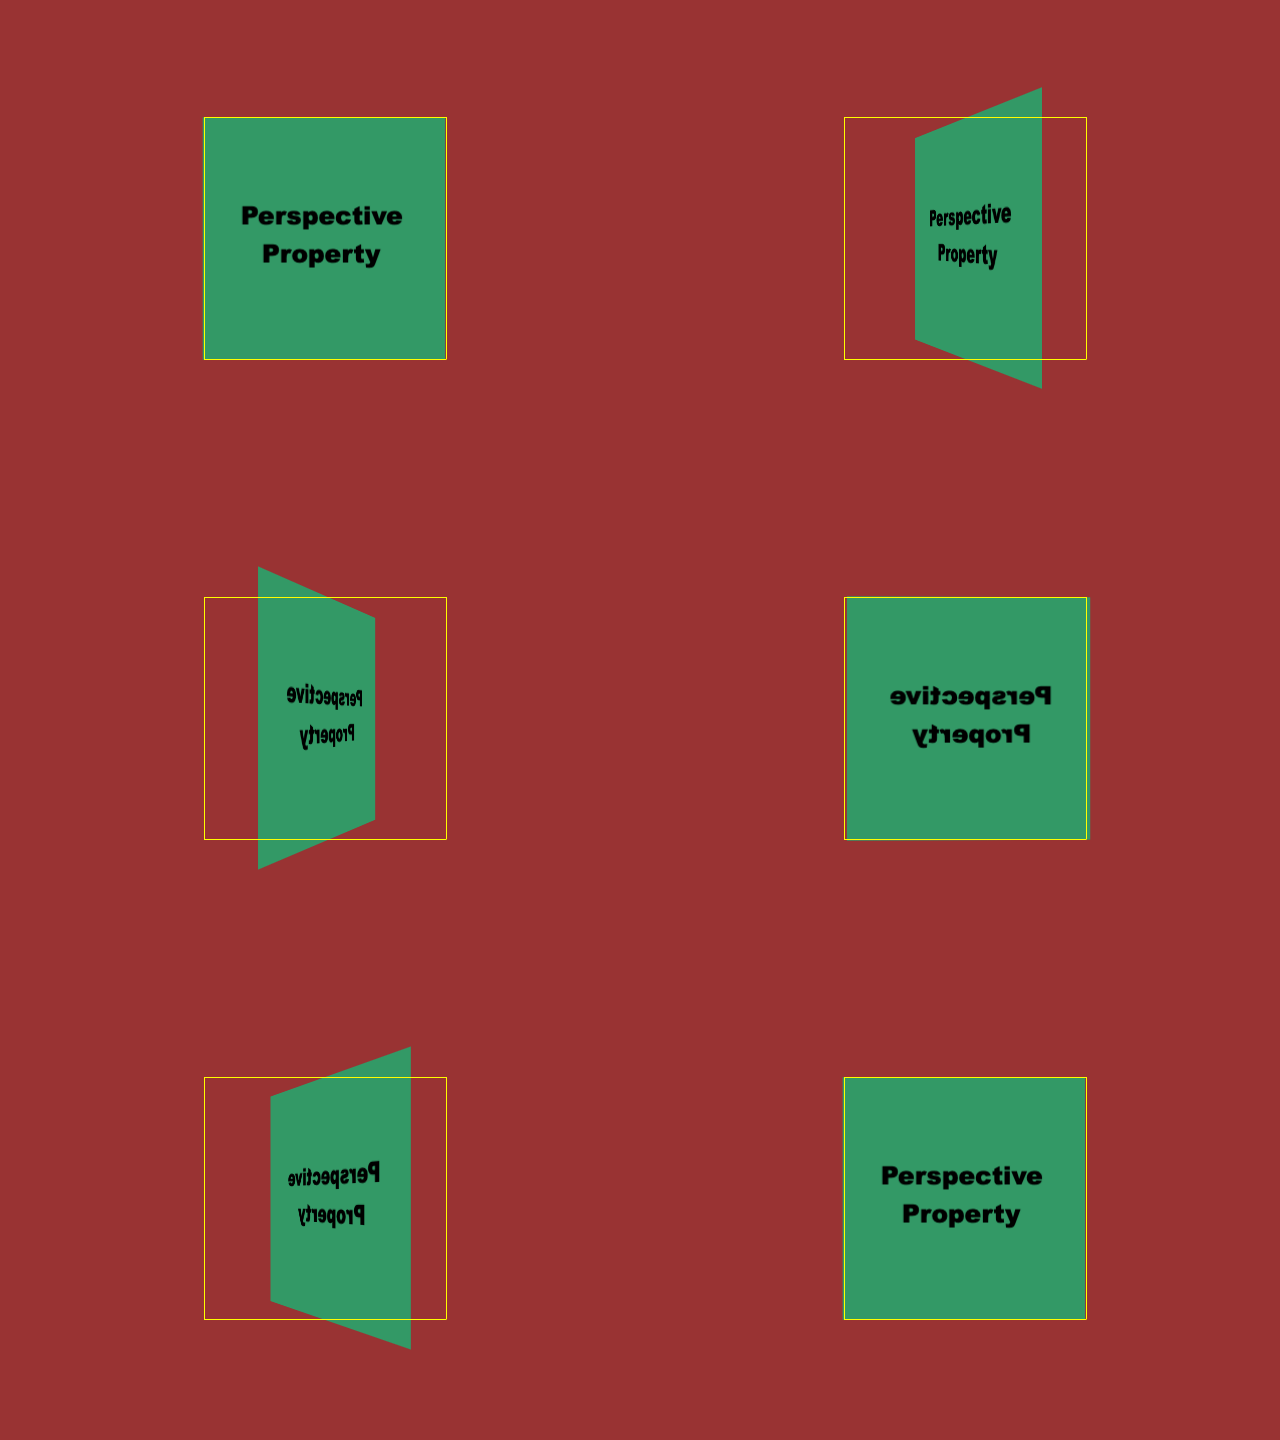
The CSS perspective property is used to give a 3D-positioned element some perspective.

The perspective property defines how far the object is away from the user. So, a lower value will result in a more intensive 3D effect than a higher value.

When defining the perspective property for an element, it is the CHILD elements that get the perspective view, NOT the element itself.

CSS Syntax:

perspective: length|none;

Where:

length– how far the element is placed from the view.

none default value. Same as 0. The perspective is not set.

Example:

<!DOCTYPE html>
<html>
<head>
<style>
#el1 {
  position: relative;
  height: 100px;
  width: 100px;
  margin-left: 60px;
  border: 5px solid #2a9d8f;
  perspective: 100px;  
}
#el2, #el4 {
  padding: 35px;
  position: absolute;
  border: 5px solid #e76f51;
  background-color: #e9c46a; 
  transform-style: preserve-3d;
  transform: rotateX(45deg);
  opacity:0.5; 
}
#el3 {
  position: relative;
  height: 100px;
  width: 100px;
  margin-left: 60px;
  border: 5px solid #2a9d8f;
  perspective: none;
}
</style>
</head>
<body>

<h4>perspective: 100px:</h4>
<div id="el1">1
  <div id="el2">2</div>
</div>
<h4>perspective: none:</h4>
<div id="el3">3
  <div id="el4">4</div>
</div>
</body>

Output:

perspective: 100px:

1
2

perspective: none:

3
4

CSS Perspective-origin Property

The perspective-origin property defines at which position the user is looking at the 3D-positioned element.

When defining the perspective-origin property for an element, it is the CHILD elements that will get the effect, NOT the element itself.

CSS Syntax:

perspective-origin: x-axis y-axis;

Where:

x-axis – defining where the view is placed at the x-axis (left, center, right, length, %). Default value: 50%.

y-axis – defining where the view is placed at the y-axis (top, center, bottom, length, %). Default value: 50%.

Example:

<!DOCTYPE html>
<html>
<head>
<style>
#element1 {
  position: relative;
  height: 100px;
  width: 100px;
  margin-left: 150px;
  margin-top:30px;
  border: 5px solid #2a9d8f;
  perspective: 100px;
  perspective-origin: right;  
}
#element2, #element4, #element6 {
  padding: 50px;
  position: absolute;
  border: 5px solid #e76f51;
  background-color: #e9c46a; 
  opacity:0.5;
  transform-style: preserve-3d;
  transform: rotateX(45deg);
}
#element3 {
  position: relative;
  height: 100px;
  width: 100px;
  margin-left: 150px;
  margin-top:60px;
  border: 5px solid #2a9d8f;
  perspective: 150px;
  perspective-origin: top left;
}
#element5 {
  position: relative;
  height: 100px;
  width: 100px;
  margin-top:60px;
  margin-left: 150px;
  border: 5px solid #2a9d8f;
  perspective: 100px;
  perspective-origin: -80%;  
}
</style>
</head>
<body>
<h4>perspective-origin: right:</h4>
<div id="element1">1
  <div id="element2">2</div>
</div>
<h4>perspective-origin: top left:</h4>
<div id="element3">3
  <div id="element4">4</div>
</div>
<h4>perspective-origin: -80%:</h4>
<div id="element5">5
  <div id="element6">6</div>
</div>
</body>
</html>

Output:

perspective-origin: right:

1
2


perspective-origin: top left:

3
4


perspective-origin: -80%:

5
6


3d Cube

Using all knowledge from above we can create now a 3d cube.

We can create cubes setting different perspectives. In the first example, the CSS perspective property is set to 200px, in the second example 900px.

Example1:

Perspective: 200px;

<!DOCTYPE html>
<html>
<head>
<style>

.cube-content {
  perspective: 200px;
}

.cube {
  font-size: 4em;
  width: 2em;
  margin: 1.5em auto;
  transform-style: preserve-3d;
  transform: rotateX(-45deg) rotateY(30deg);
}

.side {
  position: absolute;
  width: 2em;
  height: 2em;
  background-color: #e9c46a;
  color: #264653;
  opacity:0.5;
  border: 1px solid #264653;
  text-align: center;
  line-height: 2em;
}

.front {transform: translateZ(1em);}
.top {transform: rotateX(90deg) translateZ(1em);}
.right {transform: rotateY(90deg) translateZ(1em);}
.left {transform: rotateY(-90deg) translateZ(1em);}
.bottom {transform: rotateX(-90deg) translateZ(1em);}
.back {transform: rotateY(-180deg) translateZ(1em);}
</style>
</head>
<body>

<div class="cube-content">
  <div class="cube">
  <div class="side front">1</div>
  <div class="side back">6</div>
  <div class="side right">4</div>
  <div class="side left">3</div>
  <div class="side top">5</div>
  <div class="side bottom">2</div>
  </div>
</div>

</body>
</html>

Output:

1
6
4
3
5
2


Example2:

Perspective: 900px:

<!DOCTYPE html>
<html>
<head>
<style>
.cube-container {
  perspective: 900px;
}

.cube {
  font-size: 4em;
  width: 2em;
  margin: 1.5em auto;
  transform-style: preserve-3d;
  transform: rotateX(-45deg) rotateY(30deg);
}

.side {
  position: absolute;
  width: 2em;
  height: 2em;
  background-color: #e9c46a;
  opacity:0.5;
  border: 1px solid #264653;
  color: #264653;
  text-align: center;
  line-height: 2em;
}

.front {transform: translateZ(1em);}
.top {transform: rotateX(90deg) translateZ(1em);}
.right {transform: rotateY(90deg) translateZ(1em);}
.left {transform: rotateY(-90deg) translateZ(1em);}
.bottom {transform: rotateX(-90deg) translateZ(1em);}
.back {transform: rotateY(-180deg) translateZ(1em);}
</style>
</head>
<body>

<div class="cube-container">
  <div class="cube">
  <div class="side front">1</div>
  <div class="side back">6</div>
  <div class="side right">4</div>
  <div class="side left">3</div>
  <div class="side top">5</div>
  <div class="side bottom">2</div>
  </div>
</div>
</body>
</html>

Output:

1
6
4
3
5
2


Enjoy coding!

Read also:

CSS & jQuery 3d Cube

Roll the dice!

CSS Door Animation (Open/Close on Hover)

Categories
Web development

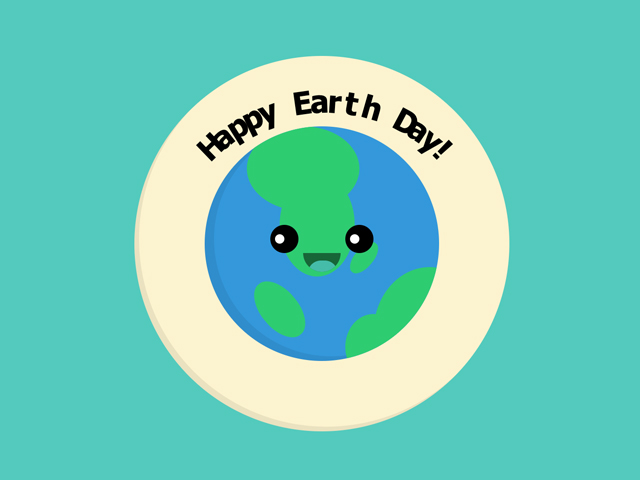
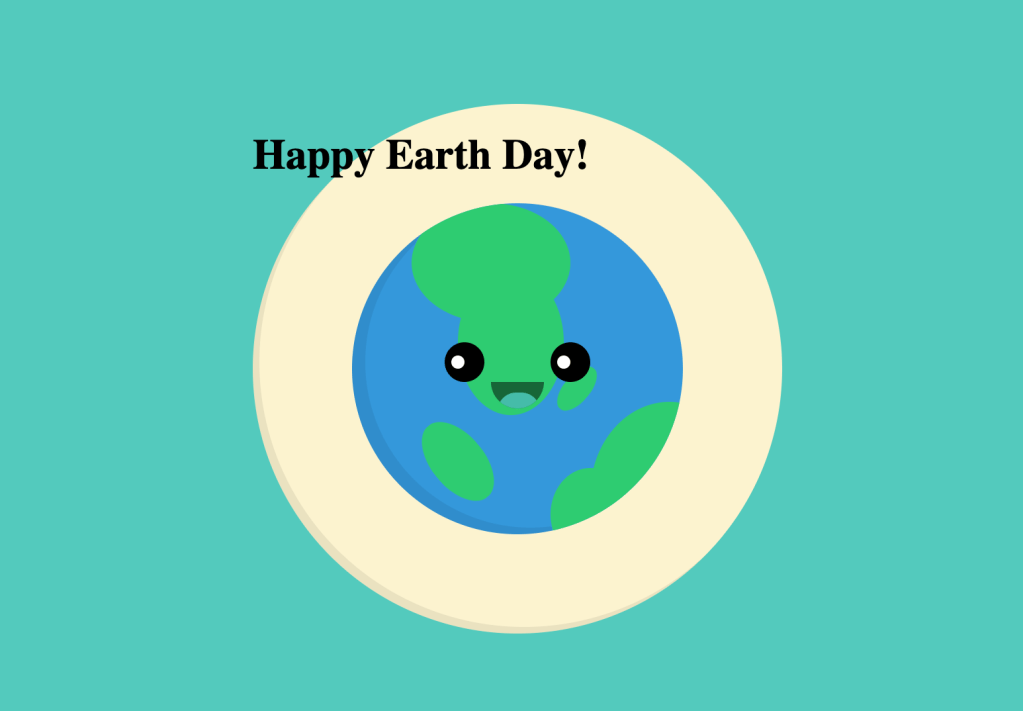
Happy Earth Day! /lettering.js

CSS Earth Day

Demo:

To create Happy Earth Day! /lettering.js effect follow the steps below:

Step1.

Add HTML

<div class="container">
  <div class="earth">
    <div class="continent"></div>
    <div class="continent2"></div>
  </div>
  <div class="eyes"></div>  
  <div class="smile"></div>
  <div class="shadow">
    <div class="circle"><h1>Happy Earth Day!</h1></div>
  </div>
    </div>

Step2.

Add JQuery

Add first these in the <head> section:

<script src="https://cdnjs.cloudflare.com/ajax/libs/jquery/3.5.0/jquery.min.js"></script>
	<script src="https://cdnjs.cloudflare.com/ajax/libs/lettering.js/0.7.0/jquery.lettering.min.js"></script>

and then a script block with the .lettering() method:

<script>
	$(function() {
        $("h1").lettering();
    });
	</script>

Note: The resulting code will churn our .h1 and output the following:

<h1>
  <span class="char1">H</span>
  <span class="char2">a</span>
  <span class="char3">p</span>
  <span class="char4">p</span>
  <span class="char5">y</span>
  <span class="char6"></span>
  <span class="char7">E</span>
  <span class="char8">a</span>
  <span class="char9">r</span>
  <span class="char10">t</span>
  <span class="char11">h</span>
  <span class="char12"></span>
  <span class="char13">D</span>
  <span class="char14">a</span>
  <span class="char15">y</span>
  <span class="char16">!</span>
</h1>

Step3.

Add CSS

Set the colour and the position of the background and elements:

body {
  background-color: #53CABD;
  height: 100vh;
  justify-content:center;
  align-items: center;
  display: flex;
}
.container {
  position: relative;
}

Style the Earth and add continents:

.earth {
  position: relative;
  background-color: #3498DB;
  border-radius: 50%;
  width: 250px;
  height: 250px;
  overflow: hidden;
  left:25px;
  top: 25px;
  box-shadow:inset 10px -5px 0 rgba(0,0,0,0.07);
  animation: earth alternate infinite 400ms 40ms ease-in-out;
}
.continent {
  position: absolute;
  display: block;
  background-color: #2ECC71;
  width: 120px;
  height: 90px;
  border-radius: 50%; 
  left: 45px;
  
}
  
.continent:after {
  content:"";
  position: absolute;
  display: block;
  background-color: #2ECC71;
  width: 80px;
  height: 110px;
  border-radius: 50%; 
  top:50px;
  left:35px;
  
}
.continent:before {
  content:"";
  position: absolute;
  display: block;
  background-color: #2ECC71;
  width: 20px;
  height: 40px;
  border-radius: 50%; 
  top:120px;
  left:115px;
  transform: rotate(40deg);
  

}
.continent2 {
  position: absolute;
  background-color: #2ECC71;
  width: 120px;
  height: 140px;
  border-radius: 50%; 
  top: 150px;
  left: 180px;
}
.continent2:after {
  content:"";
  position: absolute;
  background-color: #2ECC71;
  width: 60px;
  height: 70px;
  border-radius: 50%; 
  left:-30px;
  top:50px;
}
.continent2:before {
  content:"";
  position: absolute;
  background-color: #2ECC71;
  width: 40px;
  height: 70px;
  border-radius: 50%; 
  left:-120px;
  top:10px;
  transform: rotate(-40deg);
}
CSS Earth Animation

Make the Earth smile:

.eyes {
  position: absolute;
  display: block;
  background-color:black;
  z-index: 10;
  border-radius:50%;
  width: 30px;
  height: 30px;
  top:130px;
  left: 95px;
  box-shadow: 80px 0 black;
  -webkit-transform-origin: 50%;
  -webkit-animation: blink 2s infinite;
}
.eyes:before {
  content:"";
  position: absolute;
  background-color: white;
  width: 10px;
  height: 10px;
  border-radius:50%;
  top: 10px;
  left: 5px;
  box-shadow: 80px 0 white;
}

.smile {
  position: absolute;
  top: 160px;
  left: 130px;
  width: 40px;
  height: 20px;
  opacity:0.5;
  border-radius: 0 0 100px 100px;
  overflow: hidden;
  background:#000;
}
.smile:after {
  content:"";
  position: absolute;
  top: 8px;
  left: 5px;
  width: 80%;
  height: 70%;
  border-radius: 100px 100px 0 0;
  background: #5DADE2;
  opacity: 1;
}
CSS Smiling Earth

Add an extra background to the Earth:

.shadow {
  position: absolute;
  border-radius: 50%;
  top:-50px;
  left:-50px;
  background-color: #FCF3CF;
  width: 400px;
  height: 400px;
  z-index:-10;
  box-shadow:inset 5px -5px 0 rgba(0,0,0,0.07);
}
CSS Earth Day

The text is easy to manipulate in your CSS using an ordinal .char# pattern. 

.circle {
  position: relative;
  width: 400px;
  border-radius: 50%;
  transform: rotate(-50deg);
}

h1 span {
  font-size:33px;
  font-family: tahoma;
  height: 200px;
  position: absolute;
  width: 20px;
  left: 35px;
  top: -65px;
  transform-origin: bottom;  
}

.char1 {
  transform: rotate(4deg);
}

.char2 {
  transform: rotate(12deg);
}

.char3 {
  transform: rotate(18deg);
}

.char4 {
  transform: rotate(24deg);
}

.char5 {
  transform: rotate(30deg);
}

.char6 {
  transform: rotate(36deg);
}

.char7 {
  transform: rotate(42deg);
}

.char8 {
  transform: rotate(48deg);
}

.char9 {
  transform: rotate(54deg);
}

.char10 {
  transform: rotate(60deg);
}

.char11 {
  transform: rotate(66deg);
}

.char12 {
  transform: rotate(72deg);
}

.char13 {
  transform: rotate(78deg);
}

.char14 {
  transform: rotate(84deg);
}
.char15 {
  transform: rotate(90deg);
}

.char16 {
  transform: rotate(96deg);
}

Step4.

Add CSS Animation

For the Earth’s eyes:

@-webkit-keyframes blink {
    0%, 100% {
        transform: scale(1, .05);
    }
    5%,
    95% {
        transform: scale(1, 1);
    }
}

and the globe:

@keyframes earth { 
  to { transform: scaleX(1.03) scaleY(0.97); } 
}

Enjoy coding!

Read also:

CSS Tooltips

CSS Mirror/ Reflection Text Effect

CSS Slide Text Animation/ Slide Effect

Categories
Web development

jQuery Intro/ Adding jQuery to HTML

jQuery is a lightweight, “write less, do more”, JavaScript library.

There are lots of other JavaScript libraries out there, but jQuery is probably the most popular, and also the most extendable.

jQuery Introduction

The purpose of jQuery is to make it much easier to use JavaScript on the webpage. jQuery takes a lot of common tasks that require many lines of JavaScript code to accomplish and wraps them into methods that you can call with a single line of code.

Before you start studying jQuery, you should have a basic knowledge of:

  1. HTML
  2. CSS
  3. JavaScript

Let’s get jQuery started:

Adding jQuery to HTML

There are several ways to start using jQuery on your website:

Downloading jQuery

There are two versions of jQuery available for downloading:

  1. Production version – this is for your live website because it has been minified and compressed
  2. Development version – this is for testing and development (uncompressed and readable code)

Both versions can be downloaded from jQuery.com.

The jQuery library is a single JavaScript file, and you reference it with the HTML <script> tag.

Note: The <script> tag should be inside the <head> section.

<head>
<script src="jquery-3.4.1.min.js"></script>
</head>

jQuery CDN

If you don’t want to download and host jQuery yourself, you can include it from a CDN (Content Delivery Network).

Both Google and Microsoft host jQuery.

To use jQuery from Google or Microsoft, use one of the following:

Google CDN:

<!DOCTYPE html>
<html>
<head>
<script src="https://ajax.googleapis.com/ajax/libs/jquery/3.4.1/jquery.min.js"></script>
<script>
$(document).ready(function(){
  $("button").click(function(){
    $("p").hide();
  });
});
</script>
</head>
<body>

<h4>jQuery CDN</h4>

<p>Click on the button.</p>
<p>To hide the paragraphs.</p>

<button>Click me</button>

</body>
</html>

Output:

jQuery CDN

Click on the button.

To hide paragraphs.

Microsoft CDN:

<!DOCTYPE html>
<html>
<head>
<script src="https://ajax.aspnetcdn.com/ajax/jQuery/jquery-3.4.1.min.js">
</script>
<script>
$(document).ready(function(){
  $("button").click(function(){
    $("p").hide();
  });
});
</script>
</head>
<body>

<h4>Microsoft CDN</h4>

<p>Click on the button.</p>
<p>To hide paragraphs.</p>

<button>Click me</button>

</body>
</html>

Output:

Microsoft CDN

Click on the button.

To hide paragraphs.

Enjoy coding!

Read also:

JavaScript Introduction

JavaScript Math Object