Categories
Web development

HTML5 Canvas Analog Clock

Canvas Clock JavaScript

Demo:

*to see the Canvas Analog Clock on the website click here.

To create the HTML5 Canvas Analog Clock follow the steps below:

  1. Add HTML
  2. Add CSS
  3. Add JavaScript

Step1.

Add HTML

<canvas id="canvas-clock" width="300" height="300"</canvas>

Step2.

Add CSS

Set the colour and the position of the background and elements:

body {
  background-color: #778da9;
  display: flex;
  height: 100vh;
  align-items: center;
  justify-content: center;
}

#canvas-clock {
  position: relative;
  background-color: transparent;  
}

Step3.

Add JavaScript

var canvas = document.getElementById("canvas-clock");
var contex = canvas.getContext("2d");
var radius = canvas.height / 2;
contex.translate(radius, radius);
radius = radius * 0.90
setInterval(drawClock, 1000);

function drawClock() {
  drawFace(contex, radius);
  drawNumbers(contex, radius);
  drawTime(contex, radius);
}

function drawFace(contex, radius) {
  var grad;
  contex.beginPath();
  contex.arc(0, 0, radius, 0, 2*Math.PI);
  contex.fillStyle = '#e0e1dd';
  contex.fill();
  contex.strokeStyle = "#333";
  contex.lineWidth = radius*0.1;
  contex.stroke();
  contex.beginPath();
  contex.arc(0, 0, radius*0.1, 0, 2*Math.PI);
  contex.fillStyle = '#333';
  contex.fill();
}

function drawNumbers(contex, radius) {
  var ang;
  var num;
  contex.font = radius*0.15 + "px Helvetica";
  contex.textBaseline="middle";
  contex.textAlign="center";
  for(num = 1; num < 13; num++){
    ang = num * Math.PI / 6;
    contex.rotate(ang);
    contex.translate(0, -radius*0.85);
    contex.rotate(-ang);
    contex.fillText(num.toString(), 0, 0);
    contex.rotate(ang);
    contex.translate(0, radius*0.85);
    contex.rotate(-ang);
  }
}

function drawTime(contex, radius){
    var now = new Date();
    var hour = now.getHours();
    var minute = now.getMinutes();
    var second = now.getSeconds();
    
    hour=hour%12;
    hour=(hour*Math.PI/6)+
    (minute*Math.PI/(6*60))+
    (second*Math.PI/(360*60));
    drawHand(contex, hour, radius*0.5, radius*0.07);
    
    minute=(minute*Math.PI/30)+(second*Math.PI/(30*60));
    drawHand(contex, minute, radius*0.8, radius*0.07);
    
    second=(second*Math.PI/30);
    drawHand(contex, second, radius*0.9, radius*0.02);
}

function drawHand(contex, pos, length, width) {
    contex.beginPath();
    contex.lineWidth = width;
    contex.lineCap = "round";
    contex.moveTo(0,0);
    contex.rotate(pos);
    contex.lineTo(0, -length);
    contex.stroke();
    contex.rotate(-pos);
}

Enjoy coding!

Read also:

CSS & JavaScript Digital Clock

Countdown Timer

HTML & CSS Clock Animation

Categories
Web development

Solar System Animation

Planets Solar System Animation

Demo:

*to see the animation on the website click here.

To create the CSS and JavaScript Solar System Animation follow the steps below:

  1. Add HTML
  2. Add CSS
  3. Add JavaScript

Step1.

Add HTML

<div class="milkyWay">
  <div class="sun"></div>
  <div class="planetOne">
    <div id="moveMercury" class="mercury"></div>
  </div>
  <div class="planetTwo">
    <div id="moveVenus" class="venus"></div>
  </div>
  <div class="planetThree">
     <div id="moveEarth" class="earth"></div>
  </div>
  <div class="planetFour">
    <div id="moveMars" class="mars"></div>
  </div>
  <div class="planetFive">
    <div id="moveJupiter" class="jupiter"></div>
  </div>
  <div class="planetSix">
    <div id="moveSaturn" class="saturn"></div>
  </div>
  <div class="planetSeven">
    <div id="moveUranus" class="uranus"></div>
    </div>
  </div>

Step2.

Add CSS

Set the colour and the position of the background and elements:

body {
  display: flex;
  justify-content: center;
  align-items: center;
  height: 100vh;
  background-color: #1c2541;
}

.milkyWay {
  position: relative;
}

Add the center of the animation:

.sun {
  position: relative;
  width:50px;
  height: 50px;
  border-radius:50%;
  background-color: #ffd100;
}

.sun:before, .sun:after {
  content:"";
  position: absolute;
  background-color: rgba(255,209,0,0.1);
  border-radius:50%;
}

.sun:before {
  width:70px;
  height: 70px;
  top:-10px;
  left:-10px;
}

.sun:after {
  width: 90px;
  height: 90px;
  top:-20px;
  left:-20px;
}

Add the orbits and style planets:

.planetOne {
  position: absolute;
  width: 120px;
  height: 120px;
  border-radius:50%;
  border: 1px solid #fff;
  top:-35px;
  left:-35px;
}

.mercury {
  position: absolute;
  width: 15px;
  height:15px;
  border-radius:50%;
  background-color: #c9a227;
  top:20px;
  left:2px;
}

.planetTwo {
  position: absolute;
  width: 170px;
  height: 170px;
  border-radius:50%;
  border: 1px solid #fff;
  top:-60px;
  left:-60px;
}

.venus {
  position: absolute;
  width: 18px;
  height:18px;
  border-radius:50%;
  background-color: #ff9b85;
  top:90px;
  left:-8px;
}

.planetThree {
  position: absolute;
  width: 220px;
  height: 220px;
  border-radius:50%;
  border: 1px solid #fff;
  top:-85px;
  left:-85px;
}

.earth {
  position: absolute;
  width: 22px;
  height:22px;
  border-radius:50%;
  background-color: #0496ff;
  left:100px;
  top:-10px;
  overflow:hidden;
}

.earth:before {
  content:"";
  position: absolute;
  width:10px;
  height:5px;
  border-radius:10px;
  background-color: #38b000;
  box-shadow: 5px 5px #38b000, 10px 5px #38b000, -2px 10px #38b000, 15px 10px #38b000,5px 15px #38b000;
}

.planetFour {
  position: absolute;
  width: 270px;
  height: 270px;
  border-radius:50%;
  border: 1px solid #fff;
  top:-110px;
  left:-110px;
}

.mars {
  position: absolute;
  width: 16px;
  height:16px;
  border-radius:50%;
  background-color: #db3a34;
  top:200px;
  left:12px;
}

.planetFive {
  position: absolute;
  width: 330px;
  height: 330px;
  border-radius:50%;
  border: 1px solid #fff;
  top:-140px;
  left:-140px;
}

.jupiter {
  position: absolute;
  border-radius:50%;
  background-color: #ff9100;
  width:28px;
  height:28px;
  overflow: hidden;
}

.jupiter:before {
  content:"";
  position: absolute;
  border-radius:20px;
  width:12px;
  height:5px;
  background-color: rgba(255,255,255,0.3);
  box-shadow: 15px 10px rgba(255,255,255,0.3), 5px 15px rgba(255,255,255,0.3),5px 25px rgba(255,255,255,0.3);
}

.planetSix {
  position: absolute;
  width: 390px;
  height: 390px;
  border-radius:50%;
  border: 1px solid #fff;
  top:-170px;
  left:-170px;
}

.saturn {
  position: absolute;
  width:25px;
  height: 25px;
  border-radius:50%;
  background-color: #4281a4;
  transform-style: preserve-3d;
}

.saturn:before {
  content:"";
  position: absolute;
  border: solid 7px #9cafb7;
  border-radius: 50%;
  width: 35px;
  height: 28px;
  transform: rotate3d(1, 0, 0, 75deg); 
  left:-12px;
  top:-8px;
}

.planetSeven {
  position: absolute;
  width: 450px;
  height: 450px;
  border-radius:50%;
  border: 1px solid #fff;
  top:-200px;
  left:-200px;
}

.uranus {
  position: absolute; 
  width:22px;
  height: 22px;
  border-radius:50%;
  background-color: #004e89;
  overflow: hidden;
}

.uranus:before {
  content:"";
  position: absolute;
  background-color: #1a659e;
  width:15px;
  height:3px;
  border-radius:10px;
  box-shadow: 5px 5px #1a659e, -5px 15px #1a659e;
}

Step3.

Add JavaScript

var rotatePlanets = (function() {
    
function getPosition(settings, ellapsedTime) {
        var angle = getAngle(settings, ellapsedTime);
        return {
            x: Math.round(settings.center.x + settings.radius * Math.cos(angle)),
            y: Math.round(settings.center.y + settings.radius * Math.sin(angle))
        };
    }
    
function getAngle(settings, ellapsedTime) {
        return ellapsedTime / settings.interval * 2 * Math.PI * settings.direction - settings.startPositionRad;
    }
    
function start(id, settings) {
        var el = document.getElementById(id),
            startTime = (new Date()).getTime(),
            width = el.offsetWidth,
            height = el.offsetHeight;
        if(el['#rot:pl'] !== null) stop(id);
        el.style.position = settings.cssPosition || 'absolute';
        if(!settings.startPositionRad) settings.startPositionRad = settings.startPositionDeg / 180 * Math.PI;
        el['#rot:pl'] = setInterval(function() {
            var pos = getPosition(settings, (new Date()).getTime() - startTime);
            el.style.left = (pos.x - Math.round(width / 2)) + 'px';
            el.style.top = (pos.y - Math.round(height / 2)) + 'px';
        }, settings.updateInterval);
        if(settings.iterations > -1) setTimeout(function() {
            stop(id);
        }, settings.iterations * settings.interval);
    }
    
    function stop(id) {
        var el = document.getElementById(id);
        if(el['#rot:pl'] === null) return;
        clearInterval(el['#rot:pl']);
        el['#rot:pl'] = null;
    }
    
    return {
        start: start,
        stop: stop
    };
    
})();

Set the parameters to each planet separately:

rotatePlanets.start('moveMercury', {
    radius: 60,
    center: { x: 60, y: 60 },
    interval: 8000,
    direction: 1,
    iterations: -1,
    startPositionDeg: 175,  
    updateInterval: 50
});

rotatePlanets.start('moveVenus', {
    radius: 85,
    center: { x: 85, y: 85 },
    interval: 9000,
    direction: 1,
    iterations: -1,
    startPositionDeg: 350,  
    updateInterval: 50
});

rotatePlanets.start('moveEarth', {
    radius: 110,
    center: { x: 110, y: 110 },
    interval: 10000,
    direction: 1,
    iterations: -1,
    startPositionDeg: 125,  
    updateInterval: 50
});

rotatePlanets.start('moveMars', {
    radius: 135,
    center: { x: 135, y: 135 },
    interval: 11000,
    direction: 1,
    iterations: -1,
    startPositionDeg: 200,  
    updateInterval: 50
});

rotatePlanets.start('moveJupiter', {
    radius: 165,
    center: { x: 165, y: 165 },
    interval: 14000,
    direction: 1,
    iterations: -1,
    startPositionDeg: 305,  
    updateInterval: 50
});

rotatePlanets.start('moveSaturn', {
    radius: 195,
    center: { x: 195, y: 195 },
    interval: 15000,
    direction: 1,
    iterations: -1,
    startPositionDeg: 150,  
    updateInterval: 50
});

rotatePlanets.start('moveUranus', {
    radius: 225,
    center: { x: 225, y: 225 },
    interval: 16000,
    direction: 1,
    iterations: -1,
    startPositionDeg: 325,  
    updateInterval: 50
});

Enjoy coding!

Read also:

CSS Saturn/ Planet Rings

CSS Moon orbiting the Earth on the SVG path

CSS Windmill Animation

Categories
Web development

CSS/JS Eye Follows Mouse Cursor + Blink on Hover

CSS/JS Eye Animation

Demo:

*to see the CSS/JavaScript Eye Animation on the website click here.

To create the CSS/JavaScript Eye Animation follow the steps below and watch the video tutorial:

  1. Add HTML
  2. Add CSS
  3. Add JavaScript

Step1.

Add HTML

Create the container with the eyeball, iris, and eyelid:

<div class="container">
  <div class="eyeBall">
    <div class="iris"></div>
  </div>
  <div class="eyeLid"></div>
  <div class="lid"></div>
</div>

Step2.

Add CSS

Set the colour and the position of the background and elements:

body {
  display: flex;
  justify-content: center;
  align-items: center;
  height: 100vh;
}

.container {
  position: relative;
  cursor: pointer;
}

Style the eye:

.iris {
  position: absolute;
  width: 70px;
  height: 70px;
  border: 5px solid #333;
  background-color: #0077b6;
  border-radius:50%;
  left:40px;  
  top:30px;
}

.iris:before {
  content:"";
  position: absolute;
  background-color: #333;
  border-radius:50%;
  width:40px;
  height: 40px;
  top:22%;
  left:22%;
}

.iris:after {
  content:"";
  position: absolute;
  background-color: rgba(255,255,255,0.4);
  border-radius: 50%;
  width:15px;
  height:15px;
  top:35%;
  left:65%;
  box-shadow: -35px 20px rgba(255,255,255,0.4);
}

.eyeBall {
  position: relative;
  width: 150px;
  height: 150px;
  background-color: transparent;
  border: 5px solid #333;
  border-radius:100% 0;
  box-shadow: inset 5px 5px 5px rgba(0,0,0,0.3);
  transform: rotate(45deg);
  top:-10px;
  z-index:1;
  overflow: hidden;
}

.eyeLid {
  position: absolute;
  border-top: 5px solid #333;
  border-left: 5px solid #333;
  border-radius:100% 0;
  width: 150px;
  height: 150px;
  top:-30px;
  left:3px;
  transform: rotate(45deg);
  transition: .2s;
  z-index:10;
}

.lid {
  position: absolute;
  z-index:9;
  background-color: #fff;
  width: 295px;
  height: 270px;
  border-radius:50%;
  top:-248px;
  left:-68px;
  transition: .2s;
}

To make the eye blink add transition on hover:

.container:hover .eyeLid {
  transform: rotate(-45deg) rotateX(160deg);
}

.container:hover .lid {
  transform: translateY(90px);
}

Step3.

Add JavaScript

const eye = document.querySelector('.iris');
window.addEventListener('mousemove', (event) => {
const x = -(window.innerWidth / 2 - event.pageX) / 35;
const y = -(window.innerHeight / 2 - event.pageY) / 35;
eye.style.transform = `rotate(-45deg) translateY(${y}px)  translateX(${x}px)`;         
        }); 

Watch also the video tutorial:

Enjoy coding!

Read also:

CSS & jQuery Eye Animation

CSS & JavaScript Image Magnifier Glass

CSS & JavaScript Bee Progress Bar

Categories
Web development

JS Canvas Snow Animation

JavaScript Canvas Snow Animation

Demo:

*to see the animation on the website click here.

What do you need to do?

To create the JavaScript Canvas Snow Animation follow the steps below:

  1. Add HTML
  2. Add CSS
  3. Add JavaScript

Step1.

Add HTML

<canvas id="snowfall"></canvas>

Step2.

Add CSS

body {
  background-image: linear-gradient( to top, #fff 5%, #0396FF 100%);
  height: 100vh;
  overflow:hidden;
}

canvas {
  filter: blur(1px);
  opacity:0.7;
  height: 100vh;
}

Step3.

Add JavaScript

var canvas = document.getElementById("snowfall");
var contex = canvas.getContext('2d'),
    
cnsWidth = window.innerWidth,
cnsHeight = window.innerHeight,
numberFlakes = 250,
flakes = [];

function Flake(x, y) {
  var topSize = 4.5, topMotion = 2.5;
  
this.x = x;
this.y = y;
this.spacing = spaceBetween(0, 0.8);
this.distance = spaceBetween(0, Math.PI);
this.weight = spaceBetween(2, topSize);
this.scale = (this.weight / topSize);
this.motion = (this.weight / topSize) * topMotion; 
  
this.update = function() {
this.x += Math.cos(this.distance) * this.spacing;   
this.y += this.motion;
  }  
}

function init() {
  var i = numberFlakes;
        
while (i--) {
    x = spaceBetween(0, cnsWidth, true);
    y = spaceBetween(0, cnsHeight, true);
        
flake = new Flake(x, y);
    flakes.push(flake);
  }
  
scaleCanvas();
  loop();  
}

function scaleCanvas() {
  canvas.width = cnsWidth;
  canvas.height = cnsHeight;
}

function loop() {
  var i = flakes.length;
  
contex.save();
contex.setTransform(1, 0, 0, 1, 0, 0);
contex.clearRect(0, 0, cnsWidth, cnsHeight);
contex.restore();
  
while (i--) {    
    flakeFront = flakes[i];
    flakeFront.update();    
    contex.beginPath();
    contex.arc(flakeFront.x, flakeFront.y, flakeFront.weight, 0, 2 * Math.PI, false);
    contex.fillStyle = "#FFFFFF"; + flakeFront.scale + ')';
    contex.fill();
    
    if (flakeFront.y >= cnsHeight) {
      flakeFront.y = -flakeFront.weight;
    }  
  }  
  requestAnimationFrame(loop);
}

function spaceBetween(min, max, round) {
  var number = Math.random() * (max - min + 1) + min;

  if (round) {
    return Math.floor(number);
  } else {
    return number;
  }
}

init();

Enjoy coding!

Read also:

CSS Snowfall

CSS Christmas Tree Snow Globe

CSS Winter window scene

Categories
Web development

How to create the Comparison Slider?

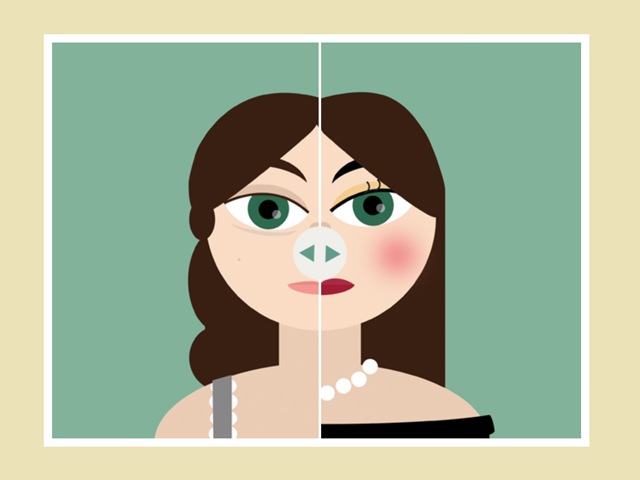
Learn how to create a Comparison Slider with CSS and JavaScript.

image comparison slider

Demo:

Before & After:

What do you need to do?

  1. Add HTML
  2. Add CSS
  3. Add JavaScript

Step1.

Add HTML

Add images that you want to compare:

<div class="img-comp-container">
  <div class="img-comp-img">
    <img src="https://lenadesign.org/wp-content/uploads/2021/04/make-up-1.jpg" width="640" height="480">
  </div>
  <div class="img-comp-img img-comp-overlay">
    <img src="https://lenadesign.org/wp-content/uploads/2021/04/no-make-up-1.jpg" width="640" height="480">
  </div>
</div>

Step2.

Add CSS

Set the colour and the position of the background and elements:

body {
  background-color: #eae2b7;
  display: flex; 
  align-items: center;
  justify-content: center;
  height: 100vh; 
}

.img-comp-container {
  left:-50px;
  position: relative;
  height: 480px; 
  width: 640px;
  border: 10px solid #e63946;
}

Set the position of the images:

.img-comp-img {
  position: absolute;
  width: auto;
  height: auto;
  overflow:hidden;
}

.img-comp-img img {
  display:block;
  vertical-align:middle;
}

Style the slider:

.img-comp-slider {
  position: absolute;
  cursor: ew-resize;
  width: 3px;
  height: 480px;
  background-color: white;
  color: white;
}

.img-comp-slider {
  position: absolute;
  cursor: ew-resize;
  width: 3px;
  height: 480px;
  background-color: white;
  color: white;
}

.img-comp-slider:before {
  content:"";
  position: absolute;
  content: url("https://lenadesign.org/wp-content/uploads/2021/04/dot-2.png");
  top:220px;
  left:-34px;  
}

.img-comp-slider:hover {
  box-shadow: 0 0 10px rgba(0,0,0,0.3); 
}

Step3.

Add JavaScript

function initComparisons() {
  var x, i;
  x = document.getElementsByClassName("img-comp-overlay");
  for (i = 0; i < x.length; i++) {
    compareImages(x[i]);
  }
  function compareImages(img) {
    var slider, img, clicked = 0, w, h;
    w = img.offsetWidth;
    h = img.offsetHeight;
    img.style.width = (w / 2) + "px";
    
    /*slider:*/
    slider = document.createElement("DIV");
    slider.style.zIndex = "10";
    slider.setAttribute("class", "img-comp-slider");
    img.parentElement.insertBefore(slider, img);
    slider.style.left = (w / 2) - (slider.offsetWidth / 2) + "px";
    slider.addEventListener("mousedown", slideReady);
    window.addEventListener("mouseup", slideFinish);
    slider.addEventListener("touchstart", slideReady);
    window.addEventListener("touchend", slideFinish);
    function slideReady(e) {
      
      e.preventDefault();
      clicked = 1;
      window.addEventListener("mousemove", slideMove);
      window.addEventListener("touchmove", slideMove);
    }
    function slideFinish() {
      clicked = 0;
    }
    function slideMove(e) {
      var pos;
      if (clicked == 0) return false;
      pos = getCursorPos(e)
      if (pos < 0) pos = 0;
      if (pos > w) pos = w;
      slide(pos);
    }
    function getCursorPos(e) {
      var a, x = 0;
      e = e || window.event;
      a = img.getBoundingClientRect();
      x = e.pageX - a.left;
      x = x - window.pageXOffset;
      return x;
    }
    function slide(x) {
      img.style.width = x + "px";
      slider.style.left = img.offsetWidth - (slider.offsetWidth / 2) + "px";
    }
  }
}

initComparisons();

Enjoy coding!

Read also:

CSS & JavaScript Bee Progress Bar

CSS Umbrella (Open/Close on Click)

CSS Toggle Switch

Categories
Web development

JavaScript Toggle Class

Working as a web developer, you need to often add, remove, and toggle CSS classes based on the user interactions with elements on the web page.

JavaScript Toggle Class

Toggling the class means if there is no class name assigned to the element, then a class name can be assigned to it dynamically.

Toggle between adding and removing a class name from an element with JavaScript!

Example:

Step1.

Add HTML

Toggle between adding a class name to the div element with id=”myDIV” (in this example we use a button to toggle the class name).

<button onclick="myFunction()">Click me</button>

<div id="myDIV">
  This is a DIV element.
</div>

Step2.

Add CSS

Add a class name to toggle:

.mystyle {
  width: 100%;
  padding: 25px;
  background-color: lightblue;
  color: red;
  font-size: 25px;
}

Step3.

Add JavaScript

Get the <div> element with id=”myDIV” and toggle between the “mystyle” class:

function myFunction() {
  var element = document.getElementById("myDIV");
  element.classList.toggle("mystyle");
}

Output:

This is a DIV element.

Enjoy coding!

Read also:

CSS Toggle Switch

How to create the Comparison Slider?

CSS & JavaScript Bee Progress Bar

Categories
Web development

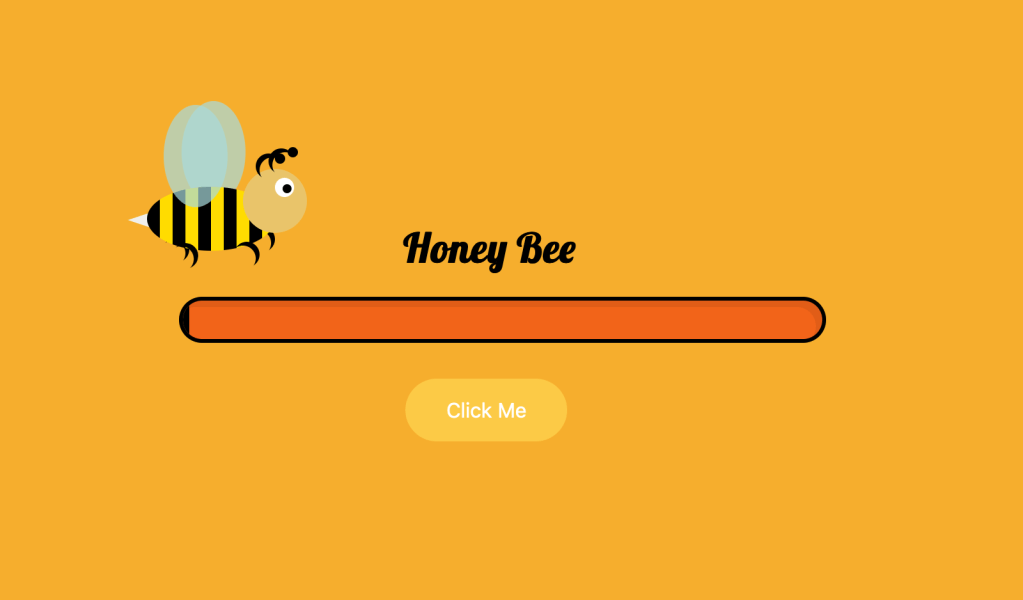
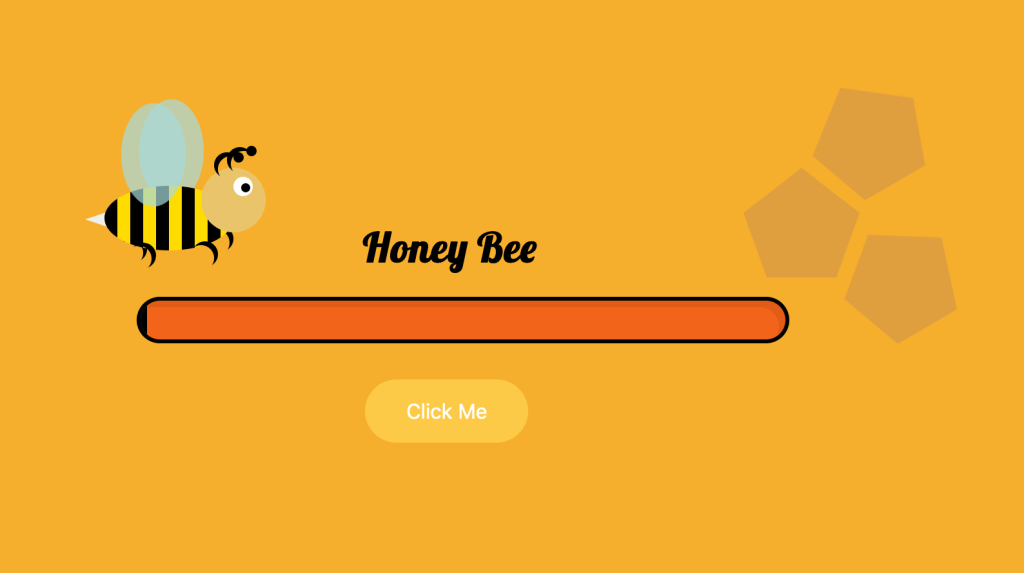
CSS & JavaScript Bee Progress Bar


bee progress bar

Demo:

*to see the Bee progress bar on the website click here.

To create the CSS & JavaScript Bee Progress Bar follow the steps below:

  1. Add HTML
  2. Add CSS
  3. Add JavaScript

Step1.

Add HTML

<div class="honey-bee">
  <div id="text"><h1>Honey Bee</h1></div>
  <div id="bee">
    <div class="head"></div>
    <div class="feelers"></div>
    <div class="body"></div>
    <div class="wingOne"></div>
    <div class="wingTwo"></div>
    <div class="legs"></div>
  </div>
  <div class="background">
    <div class="honey"></div>
    <div class="honey1"></div>
    <div class="honey2"></div>
  </div> 
<div id="progress">
   <div class="bar" id="bar"></div>
</div>
<button id="button" class="button" onclick="move()">Click Me</button> 
</div>

Step2.

Add CSS

Import the font:

@import url('https://fonts.googleapis.com/css2?family=Lobster&display=swap');

Set the colour and the position of the background and elements:

body{
   background-color: #f6ae2d;
   height: 100vh;
   display: flex;
   justify-content: center;
   align-items: center;
   overflow: hidden;
}

.honey-bee {
  position: relative;
}

Style the progress bar and the button:

#progress {
  position: relative;
  width: 500px;
  background-color: #f26419;
  border-radius:100px;
  border: 3px solid black;
  box-shadow: inset -5px 5px rgba(0,0,0,0.07); 
  top: 0;
  left:0;
  overflow:hidden;
}

#bar {
  width: 1%;
  height: 30px;
  border-radius: 100px;
  background: repeating-linear-gradient(
  to right,
  #000,
  #000 10px,
  #ffdc00 10px,
  #ffdc00 20px   
);
  text-align: center;
  line-height: 30px;
  color: white;
}

.button {
  position: absolute;
  background-color: #fcca46;
  border: none;
  color: white;
  padding: 15px 32px;
  text-align: center;
  text-decoration: none;
  font-size: 16px;
  margin: 4px 2px;
  border-radius:100px;
  cursor: pointer;
  -webkit-transition-duration: 0.4s; 
  transition-duration: 0.4s;
  top:60px;
  left:175px;
}

.button:hover {
  box-shadow: 0 12px 16px 0 rgba(0,0,0,0.24),0 17px 50px 0 rgba(0,0,0,0.19);
}

Style the text:

#text {
  position: absolute;
  top: -80px;
  left: 175px;
  font-family: 'Lobster', cursive;
}
Honey Bee progress bar

Add the Bee:

#bee {
  position: relative;
  left: 50px;
  top: -100px;
  z-index:100;
}

#bee:before {
  content:"";
  position: absolute;
  border-radius: 50%;
  box-shadow: inset -3px 3px 0px black;
  width: 20px;
  height: 20px;
  left:-62px;
  top:53px;
}

#bee:after {
  content:"";
  position: absolute;
  border-radius: 50%;
  box-shadow: inset -3px 3px 0px black;
  width: 20px;
  height: 20px;
  left:-7px;
  top:57px;
}

.head {
  position: absolute; 
  border-radius: 50%;
  width: 50px;
  height: 50px;
  background-color: #e9c46a;
  z-index:2;
}

.head:before {
  content:"";
  position: absolute;
  width: 15px;
  height: 15px;
  background-color: white;
  border-radius: 50%;
  left: 25px;
  top:7px;  
}

.head:after {
  content:"";
  position: absolute;
  background-color: black;
  border-radius:50%;
  width: 7px;
  height: 7px;
  top:12px;
  left:31px;
}

.feelers {
  position: absolute;
  border-radius: 50%;
  box-shadow: inset 3px 3px 0px black;
  width: 20px;
  height: 20px;
  top: -12px;
  left: 10px;
  z-index:3;
}

.feelers:before {
  content:"";
  position: absolute;
  border-radius: 50%;
  box-shadow: inset 3px 3px 0px black;
  width: 20px;
  height: 20px;
  top: -4px;
  left: 10px;
}

.feelers:after {
  content:"";
  position:absolute;
  content:"";
  width:8px;
  height:8px;
  border-radius:50%;
  background-color: black;
  left: 15px;
  box-shadow: 10px -5px black;
}

.body {
  position:absolute;
  width: 0;
  height: 0;
  border-right: 30px solid #f0efeb;
  border-top: 10px solid transparent;
  border-bottom: 10px solid transparent;
  left:-90px;
  top:30px;
}

.body:before {
  content:"";
  position: absolute;
  width: 100px;
  height: 50px;
  border-radius: 50%;
  background: repeating-linear-gradient(
  to right,
  #000,
  #000 10px,
  #ffdc00 10px,
  #ffdc00 20px);
  left: 15px;
  top:-26px;  
}

.body:after {
  content:"";
  position: absolute;
  border-radius: 50%;
  box-shadow: inset -3px 3px 0px black;
  width: 20px;
  height: 20px;
  left:35px;
  top:18px; 
  transform: rotate(10deg);
}

.legs {
  z-index:-1;
  position: absolute;
  border-radius: 50%;
  box-shadow: inset -3px 3px 0px black;
  width: 20px;
  height: 20px;
  left:5px;
  top:45px; 
}
.wingOne {
  position: absolute;
  background-color: #a8dadc;
  opacity: 0.7;
  width: 50px;
  height: 80px;
  border-radius: 50%;
  top:-53px;
  left:-48px;
  z-index:-4;
  transform-origin: top bottom;
	animation: fly 0.1s ease infinite;
}

.wingTwo {
  position: absolute;
  background-color: #a8dadc;
  opacity: 0.7;
  width: 50px;
  height: 80px;
  border-radius:50%;
  top:-50px;
  left:-62px;
  transform-origin: top bottom;
	animation: fly 0.1s ease infinite;
}
CSS progress bar

Make the wings move:

@keyframes fly {
	0% {
		transform:rotate(-20deg);
	}
	50% {
		transform:rotate(-40deg);
	}
}

Style the honey:

.background {
  position: absolute;
  left: 93%;
  top:-65px;
  
}

.honey {
      position: relative;
      width: 54px;
      box-sizing: content-box;
      border-width: 50px 18px 0;
      border-style: solid;
      border-color: #e09f3e transparent;
      z-index:-10;
    }

.honey:before {
      content: "";
      position: absolute;
      height: 0;
      width: 0;
      top: -85px;
      left: -18px;
      border-width: 0 45px 35px;
      border-style: solid;
      border-color: transparent transparent #e09f3e;
    }

.honey1 {
      position: relative;
      width: 54px;
      box-sizing: content-box;
      border-width: 50px 18px 0;
      border-style: solid;
      border-color: #e09f3e transparent;
      left: 70px;
      top:-10px;
      z-index:-10;
      transform: rotate(40deg);
    }

.honey1:before {
      content: "";
      position: absolute;
      height: 0;
      width: 0;
      top: -85px;
      left: -18px;
      border-width: 0 45px 35px;
      border-style: solid;
      border-color: transparent transparent #e09f3e;
    }

.honey2 {
      position: relative;
      width: 54px;
      box-sizing: content-box;
      border-width: 50px 18px 0;
      border-style: solid;
      border-color: #e09f3e transparent;
      left: 60px;
      top:-170px;
      z-index:-10;
      transform: rotate(-30deg);
    }

.honey2:before {
      content: "";
      position: absolute;
      height: 0;
      width: 0;
      top: -85px;
      left: -18px;
      border-width: 0 45px 35px;
      border-style: solid;
      border-color: transparent transparent #e09f3e;
    }
Progress Bar

Add CSS animation to move the Bee (we will use it later in the step3):

.moveright {
  animation: moveright 2s forwards;
}

@keyframes moveright {
  0% {left: 0;}
  100% {left: 500px;}
}

Step3.

Add JavaScript

To move the bee:

const dist = document.querySelector('#bee');

document.querySelector('button').addEventListener('click', () => {
  dist.classList.remove('moveright');
  setTimeout(function(){
    dist.classList.add('moveright');
  },100);
});

For the progress bar:

var i = 0;
function move() {
  if (i == 0) {
    i = 1;
    var elem = document.getElementById("bar");  
    var width = 10;
    var id = setInterval(frame, 15);
    function frame() {
      if (width >= 100) {
        clearInterval(id);
        i = 0;
      } else {
        width++;
        elem.style.width = width + "%";
        elem.innerHTML = width  + "%";
        
      }
    }
  }
}

Enjoy coding!

Read also:

CSS Background Change Animation – Day & Night

CSS Bubbles Animation

CSS & jQuery Calculator

Categories
Web development

JS Simple Signature Pad

Create the Signature Pad and export the file as PNG.

signature pad

Demo:

What do you need to do?

  1. Add HTML
  2. Add CSS
  3. Add JavaScript

Step1.

Add HTML

Create the canvas-wrap:

<div id="canvas-wrap">
<canvas id="canvas"></canvas>   
<div id="buttons">
       <div id="text">Please sign above</div>
       <input type="button" id="download" value="Save as PNG"/>
      <input type="button" id="clear" value="Clear">
    </div>
</div>

Step2.

Add CSS

body {
  height: 100vh;
}

canvas {  
  background-color: #fff;
  border-radius: 15px;
  border: 5px solid black; 
}

#canvas-wrap {
  position: relative;
 
}

 #download, #clear {
        position: relative;
        top: 0;
        left: 170px;
        padding: 10px;
        background-color: #57c4e5;
        border: 3px solid black;
        color: black;
        display: block-inline;
        margin-top: 5px;
        margin-right:5px;
        transition: .3s;
      }

#download:hover, #clear:hover {
  background-color: transparent;
}

#text {
  position:relative;
  font-weight: bold;
  left: 190px;
}

Step3.

Add JavaScript

To draw on the canvas:

var canvas = document.querySelector('canvas');
  canvas.style.position = 'relative';
  canvas.style.top = "0";
  canvas.style.left = "0";

var ctx = canvas.getContext('2d');
canvas.width = 500;
canvas.height = 350;

ctx.lineWidth = 3;
ctx.lineJoin = ctx.lineCap = 'round';

var isDrawing, drawLine;

canvas.onmousedown = function(event) {
  isDrawing = true;
  drawLine = { x: event.clientX, y: event.clientY };
};

canvas.onmousemove = function(event) {
  if (!isDrawing) return;

  ctx.beginPath();
  
  ctx.moveTo(drawLine.x, drawLine.y);
  ctx.lineTo(event.clientX, event.clientY);
  ctx.stroke();
     
  drawLine = { x: event.clientX, y: event.clientY };
};

canvas.onmouseup = function() {
  isDrawing = false;
};

To clear the canvas:

document.getElementById('clear').addEventListener('click', function() {
        ctx.clearRect(0, 0, canvas.width, canvas.height);
      }, false);

To export the file as PNG:

window.onload = function(){
var save = document.getElementById('download');

 save.onclick = function(){
    download(canvas, 'signature.png');
  }

}

function download(canvas, filename) {
  var lnk = document.createElement('a'), e;
  lnk.download = filename;
  lnk.href = canvas.toDataURL("image/png;base64");
  
  if (document.createEvent) {
    e = document.createEvent("MouseEvents");
    e.initMouseEvent("click", true, true, window,
                     0, 0, 0, 0, 0, false, false, false,
                     false, 0, null);

    lnk.dispatchEvent(e);
  } else if (lnk.fireEvent) {
    lnk.fireEvent("onclick");
  }
}

Enjoy coding!

Read also:

CSS& JavaScript Sketch board

CSS/JS Eye Follows Mouse Cursor + Blink on Hover

CSS & JavaScript Bee Progress Bar

Categories
Web development

CSS& JavaScript Sketch board

css sketchboard

Do you like sketching? Did you know that you can sketch on Java Script canvas too?

Demo:

What do you need to do?

To create the JavaScript sketch board you need to have the pencil image(cursor) in the .png/ SVG format and follow the steps below:

pencil
  1. Add HTML
  2. Add CSS
  3. Add JavaScript/ jQuery

Step1.

Add HTML

<div id="canvas-wrap">
  <div class="sketch-board">
    <div class="paper"></div>
  </div>
  <div class="paperclip"></div>
<canvas id="canvas"></canvas>
<button class="button" id="clear">Clear</button>
<button class="button" id="undo">Undo</button>
<button class="button" id="brushBlack">Black</button>
<button class="button" id="brushYellow">Yellow</button>
<button class="button" id="brushRed">Red</button>
<button class="button" id="brushBlue">Blue</button>
<button class="button" id="brushGreen">Green</button>

</div>

Step2.

Add CSS

Set the colour and the position of the background and elements:

body {
  display: flex;
  justify-content: center;
  align-items: center;
  height: 100vh;
}
#canvas-wrap {
  position: relative;
  top:-200px;
}

And the canvas with mouse cursor:

canvas {  
  background-color: #fff;
  cursor: url(https://lenadesignorg.files.wordpress.com/2020/06/pencil.png?w=79) 10 60, auto;
  z-index:100;
}

Style the sketch board:

.sketch-board {
  position: absolute;
  width: 600px;
  height: 440px;
  background-color: #c19875;
  z-index:-5;
  border-radius: 30px;
  left: -80px;
  box-shadow:inset 5px -5px 0 #846c5b;
}

.sketch-board:before {
  background-color: #fff;
  position: absolute;
  width: 50px;
  height: 170px;
  border-radius: 30px;
  content:"";
  left: 30px;
  top: 140px;
  box-shadow:inset 5px -5px 0 #846c5b;
}

.paper {
  background-color: #e6e3dc;
  width: 400px;
  height: 320px;
  position: absolute;
  top: 50px;
  left: 140px;
}

.paperclip {
  position: absolute;
  width: 150px;
  height: 40px;
  border: 7px solid #c0c0c0;
  border-radius: 20px;
  left: 180px;
  top: 15px;
  z-index:999;
}

.paperclip:after {
  position: absolute;
  content:"";
  width: 200px;
  height: 30px;
  top: -10px;
  left:-25px;
  background-color: #8b786d;
  box-shadow:inset 5px -5px 0 rgba(0,0,0,0.07);
  border-radius: 20px;  
}
CSS Sketch board

Style buttons:

.button {
  position: relative;
  background-color: #443742;
  border: none;
  border-radius:20px;
  color: #fff;
  padding: 7px 7px;
  text-align: center;
  text-decoration: none;
  display: inline-block;
  font-size: 14px;
  margin: 2px 2px;
  top: 385px;
  left:60px;
  transition-duration: 0.4s;
}

.button:hover {
  background-color: #cea07e;
}
sketch board

Step3.

Add JavaScript/ jQuery

<script src="https://cdnjs.cloudflare.com/ajax/libs/jquery/3.5.1/jquery.min.js"></script>

Note: Remember to add jQuery (code above) in the <head> section in your code.

var canvas = document.querySelector('canvas');
  canvas.style.position = 'absolute';
  canvas.style.top = "80px";
  canvas.style.left = "50px";

var ctx = canvas.getContext('2d');
canvas.width = 500;
canvas.height = 350;

var lastX;
var lastY;
var mouseX;
var mouseY;
var canvasOffset = $("#canvas").offset();
var offsetX = canvasOffset.left;
var offsetY = canvasOffset.top;
var isMouseDown = false;
var brushSize = 3;
var brushColor = "#000";

ctx.lineJoin = ctx.lineCap = 'round';

var points = [];


function handleMouseDown(e) {
    mouseX = parseInt(e.clientX - offsetX);
    mouseY = parseInt(e.clientY - offsetY);

    ctx.beginPath();
    if (ctx.lineWidth != brushSize) {
        ctx.lineWidth = brushSize;
    }
    if (ctx.strokeStyle != brushColor) {
        ctx.strokeStyle = brushColor;
    }
    ctx.moveTo(mouseX, mouseY);
    points.push({
        x: mouseX,
        y: mouseY,
        size: brushSize,
        color: brushColor,
        mode: "begin"
    });
    lastX = mouseX;
    lastY = mouseY;
    isMouseDown = true;
}

function handleMouseUp(e) {
    mouseX = parseInt(e.clientX - offsetX);
    mouseY = parseInt(e.clientY - offsetY);

    isMouseDown = false;
    points.push({
        x: mouseX,
        y: mouseY,
        size: brushSize,
        color: brushColor,
        mode: "end"
    });
}


function handleMouseMove(e) {
    mouseX = parseInt(e.clientX - offsetX);
    mouseY = parseInt(e.clientY - offsetY);

    if (isMouseDown) {
        ctx.lineTo(mouseX, mouseY);
        ctx.stroke();
        lastX = mouseX;
        lastY = mouseY;
       
        points.push({
            x: mouseX,
            y: mouseY,
            size: brushSize,
            color: brushColor,
            mode: "draw"
        });
    }
}

$("#canvas").mousedown(function (e) {
    handleMouseDown(e);
});
$("#canvas").mousemove(function (e) {
    handleMouseMove(e);
});
$("#canvas").mouseup(function (e) {
    handleMouseUp(e);
});


function redrawAll() {

    if (points.length == 0) {
        return;
    }

    ctx.clearRect(0, 0, canvas.width, canvas.height);

    for (var i = 0; i < points.length; i++) {

        var pt = points[i];

        var begin = false;

        if (ctx.lineWidth != pt.size) {
            ctx.lineWidth = pt.size;
            begin = true;
        }
        if (ctx.strokeStyle != pt.color) {
            ctx.strokeStyle = pt.color;
            begin = true;
        }
        if (pt.mode == "begin" || begin) {
            ctx.beginPath();
            ctx.moveTo(pt.x, pt.y);
        }
        ctx.lineTo(pt.x, pt.y);
        if (pt.mode == "end" || (i == points.length - 1)) {
            ctx.stroke();
        }
    }
    ctx.stroke();
}

function undoLast() {
    points.pop();
    redrawAll();
}

$("#brushGreen").click(function () {
    brushColor = "#89bd9e";
});
$("#brushYellow").click(function () {
    brushColor = "#fde74c";
});
$("#brushRed").click(function () {
    brushColor = "#e55934";
});
$("#brushBlue").click(function () {
    brushColor = "#5bc0eb";
});

$("#brushBlack").click(function () {
    brushColor = "#000";
});

var interval;
$("#undo").mousedown(function () {
    interval = setInterval(undoLast, 20);
}).mouseup(function () {
    clearInterval(interval);
});

var clear = function(){
  ctx.clearRect(0,0,500,350);
};

$('#clear').on("click",clear);

Enjoy coding!

Read also:

JS Simple Signature Pad

Roll the dice!

Decorate the Christmas tree! (CSS & jQuery/ UI drag and drop)

Categories
Web development

Roll the dice!


We know now how to toss a coin using JavaScript, so why not to try roll the dice too?

CSS and JavaScript Dice Animation

Try to roll two sixes!

Demo:

To see the dice animation on the website click here.

To create the Dice game follow the steps below and watch the video tutorial:

  1. Add HTML
  2. Add CSS
  3. Add JavaScript

Step1.

Add HTML

Create the Game container and another one for dice, and dots:

 <div class="game">
    <div class="container">
      <div id='dice1' class="dice dice-one">
        <div id="dice-one-side-one" class='side one'>
          <div class="dot one-1"></div>
        </div>
        <div id="dice-one-side-two" class='side two'>
          <div class="dot two-1"></div>
          <div class="dot two-2"></div>
        </div>
        <div id="dice-one-side-three" class='side three'>
          <div class="dot three-1"></div>
          <div class="dot three-2"></div>
          <div class="dot three-3"></div>
        </div>
        <div id="dice-one-side-four" class='side four'>
          <div class="dot four-1"></div>
          <div class="dot four-2"></div>
          <div class="dot four-3"></div>
          <div class="dot four-4"></div>
        </div>
        <div id="dice-one-side-five" class='side five'>
          <div class="dot five-1"></div>
          <div class="dot five-2"></div>
          <div class="dot five-3"></div>
          <div class="dot five-4"></div>
          <div class="dot five-5"></div>
        </div>
        <div id="dice-one-side-six" class='side six'>
          <div class="dot six-1"></div>
          <div class="dot six-2"></div>
          <div class="dot six-3"></div>
          <div class="dot six-4"></div>
          <div class="dot six-5"></div>
          <div class="dot six-6"></div>
        </div>
      </div>
   </div>
    <div class="container">
      <div id='dice2' class="dice dice-two">
        <div id="dice-two-side-one" class='side one'>
          <div class="dot one-1"></div>
        </div>
        <div id="dice-two-side-two" class='side two'>
          <div class="dot two-1"></div>
          <div class="dot two-2"></div>
        </div>
        <div id="dice-two-side-three" class='side three'>
          <div class="dot three-1"></div>
          <div class="dot three-2"></div>
          <div class="dot three-3"></div>
        </div>
        <div id="dice-two-side-four" class='side four'>
          <div class="dot four-1"></div>
          <div class="dot four-2"></div>
          <div class="dot four-3"></div>
          <div class="dot four-4"></div>
        </div>
        <div id="dice-two-side-five" class='side five'>
          <div class="dot five-1"></div>
          <div class="dot five-2"></div>
          <div class="dot five-3"></div>
          <div class="dot five-4"></div>
          <div class="dot five-5"></div>
        </div>
        <div id="dice-two-side-six" class='side six'>
          <div class="dot six-1"></div>
          <div class="dot six-2"></div>
          <div class="dot six-3"></div>
          <div class="dot six-4"></div>
          <div class="dot six-5"></div>
          <div class="dot six-6"></div>
        </div>
      </div> 
   </div>
   <div id='roll' class='roll-button'><button>Roll dice!</button></div>
  </div> 

Step2.

Add CSS

Set the colour and the position of the background and elements:

body {
  display: flex;
  justify-content: center;
  align-items: center;
  height: 100vh;
  background-color: #70c1b3;
}
.game {
  position: relative;
  width: auto;
  height: 100%; 
}

.container {
  position: relative;
  display: inline-block;
  top: 200px;
}

Style the button:

button {
  position: relative;
  top:80px;
  padding: 15px 50px;
  color: #fff;
  background-color: #f4d35e;
  border: none;
  font-size: 20px;
  border-radius: 20px; 
  box-shadow: 1px 3px #50514F;
  outline: none;
  transition: .3s; 
}
button:hover, button:active {
  outline: none;
  background: #50514F;
  cursor: pointer;
  transform: translateY(15px); 
}

Add dice and dots:

.dice {
  position: relative;
  width: 100px;
  height: 100px;
  transform-style: preserve-3d;
  transition: transform 1s; }

.dot {
  position: absolute;
  width: 20px;
  height: 20px;
  margin: -10px 5px 5px -10px;
  border-radius: 20px;
  background-color: #ef233c;
  box-shadow: inset 2px 2px #d90429;}

.dice-one {
  left: 450px; }

.dice-two {
  left: 300px;
  top:-200px;
}

.side {
  position: absolute;
  background-color: #ffF;
  border-radius:5px;
  width: 100px;
  height: 100px;
  border: 1px solid #e5e5e5;
  text-align: center;
  line-height: 2em;
}

.side:nth-child(1) {
  transform: translateZ(3.1em); }

.side:nth-child(6) {
  transform: rotateY(90deg) translateZ(3.1em); }

.side:nth-child(3) {
  transform: rotateY(-90deg) translateZ(3.1em); }

.side:nth-child(4) {
  transform: rotateX(90deg) translateZ(3.1em); }

.side:nth-child(5) {
  transform: rotateX(-90deg) translateZ(3.1em); }

.side:nth-child(2) {
  transform: rotateY(-180deg) translateZ(3.1em); }

.two-1, .three-1, .four-1, .five-1, .six-1 {
  top: 20%;
  left: 20%; }

.four-3, .five-3, .six-4 {
  top: 20%;
  left: 80%; }

.one-1, .three-2, .five-5 {
  top: 50%;
  left: 50%; }

.four-2, .five-2, .six-3 {
  top: 80%;
  left: 20%; }

.two-2, .three-3, .four-4, .five-4, .six-6 {
  top: 80%;
  left: 80%; }

.six-2 {
  top: 50%;
  left: 20%; }

.six-5 {
  top: 50%;
  left: 80%; 
}
roll the dice

Add .show elements which will spin the dice:

.show-1 {
  transform: rotateX(720deg) rotateZ(-720deg); }

.show-6 {
  transform: rotateX(-900deg) rotateZ(1080deg); }

.show-3 {
  transform: rotateY(-450deg) rotateZ(-1440deg); }

.show-4 {
  transform: rotateY(810deg) rotateZ(720deg); }

.show-5 {
  transform: rotateX(-810deg) rotateZ(-1080deg); }

.show-2 {
  transform: rotateX(450deg) rotateZ(-720deg); }

Step3.

Add JavaScript

Note: To generate a random number of the dice dots we need to use Math.floor(Math.random() * 6) + 1;
If Math.random() were to roll 0.9, we take that and multiply it by 6 which gives us 5.4. Then we take the floor of that which is 5. Then we add 1 which gives us a final result of 6. So the random numbers will only be between 1 and 6.

var elDiceOne       = document.getElementById('dice1');
var elDiceTwo       = document.getElementById('dice2');
var elComeOut       = document.getElementById('roll');

elComeOut.onclick   = function () {rollDice();};

function rollDice() {

  var diceOne   = Math.floor((Math.random() * 6) + 1);
  var diceTwo   = Math.floor((Math.random() * 6) + 1);
 
  console.log(diceOne + ' ' + diceTwo);

  for (var i = 1; i <= 6; i++) {
    elDiceOne.classList.remove('show-' + i);
    if (diceOne === i) {
      elDiceOne.classList.add('show-' + i);
    }
  }

  for (var k = 1; k <= 6; k++) {
    elDiceTwo.classList.remove('show-' + k);
    if (diceTwo === k) {
      elDiceTwo.classList.add('show-' + k);
    }
  } 
  setTimeout(rollDice(), 1000);
}

Watch also the video tutorial:

Enjoy coding!

Read also:

Heads or Tails? Toss a Coin!

CSS & JavaScript Memory Game

Games